Overview
This guide walks step-by-step through deploying the Algorithmic Trading platform on Microsoft Azure using the Azure Portal. It covers the creation and configuration of all required cloud infrastructure, including AKS, networking, and supporting resources.
For teams or developers looking for a repeatable, code-driven approach, see the Pulumi-based deployment guide
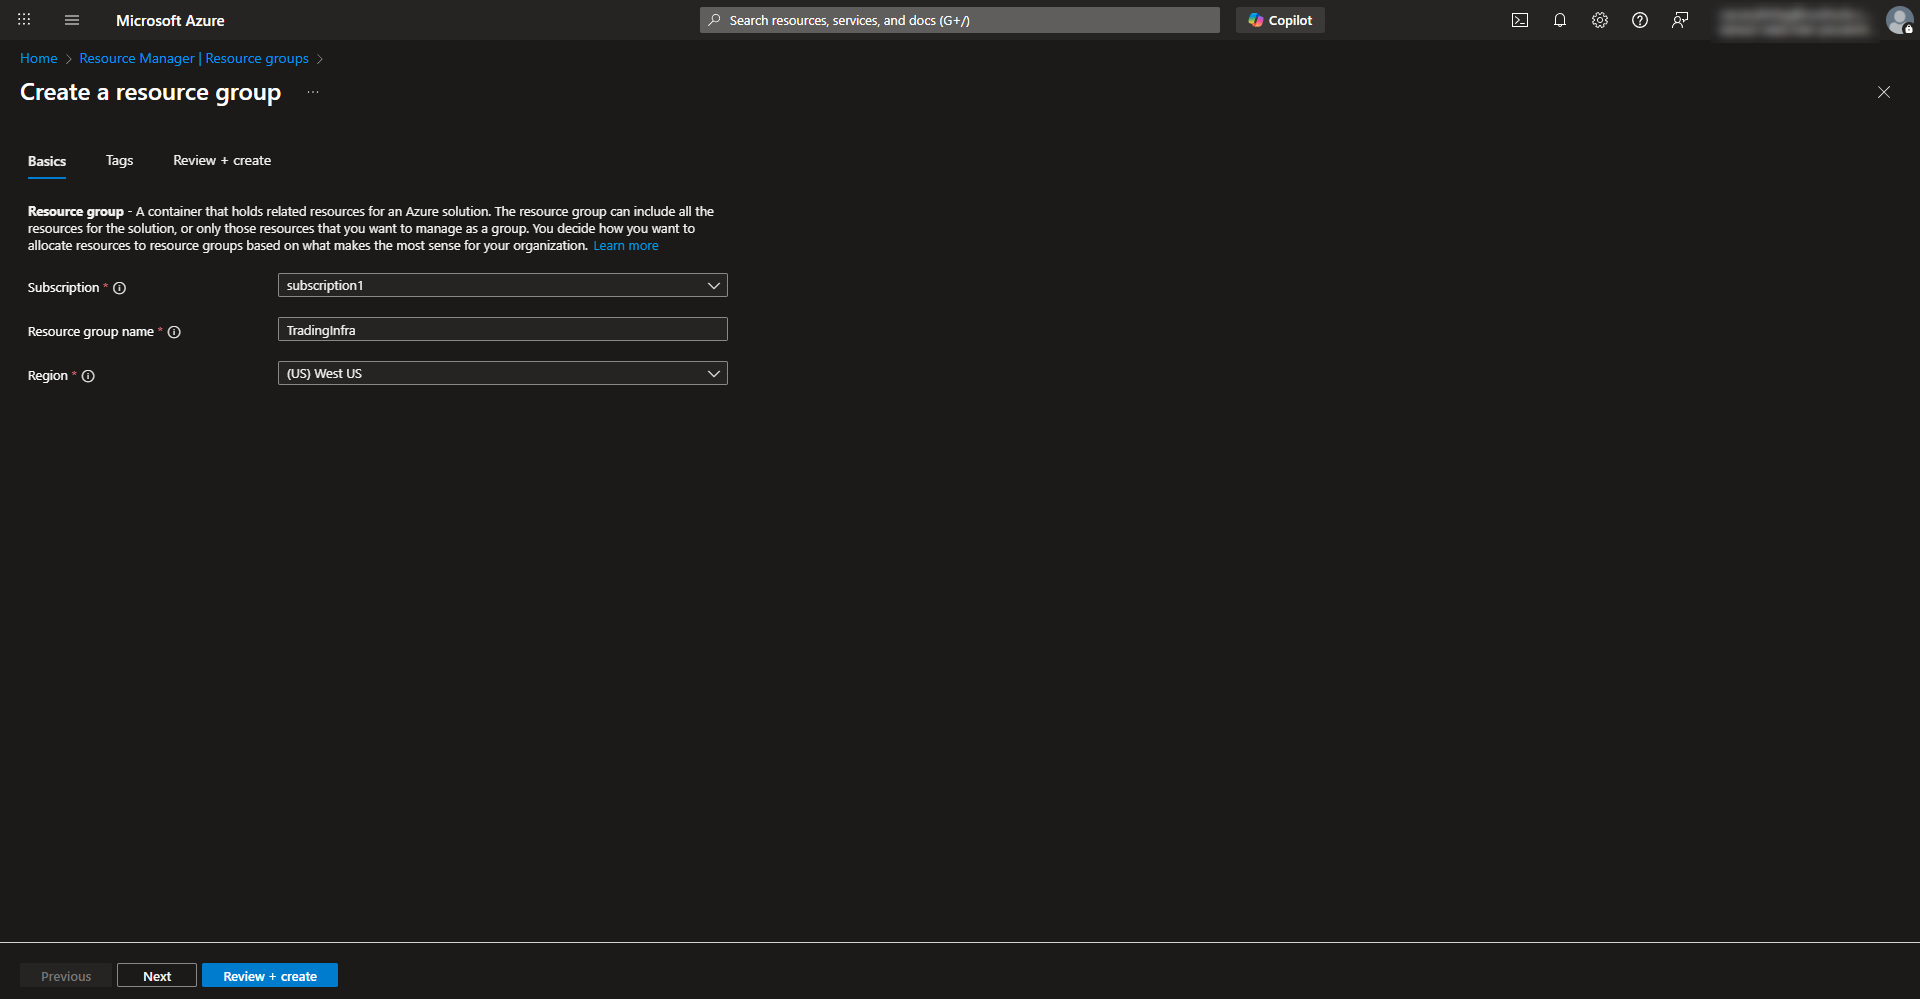
Create the main resource group for project resources
- Search for resource group in Azure to create a new resource group and complete configuration wizard. Select subscription, region, and name the group.
Creating an Azure Container Registry
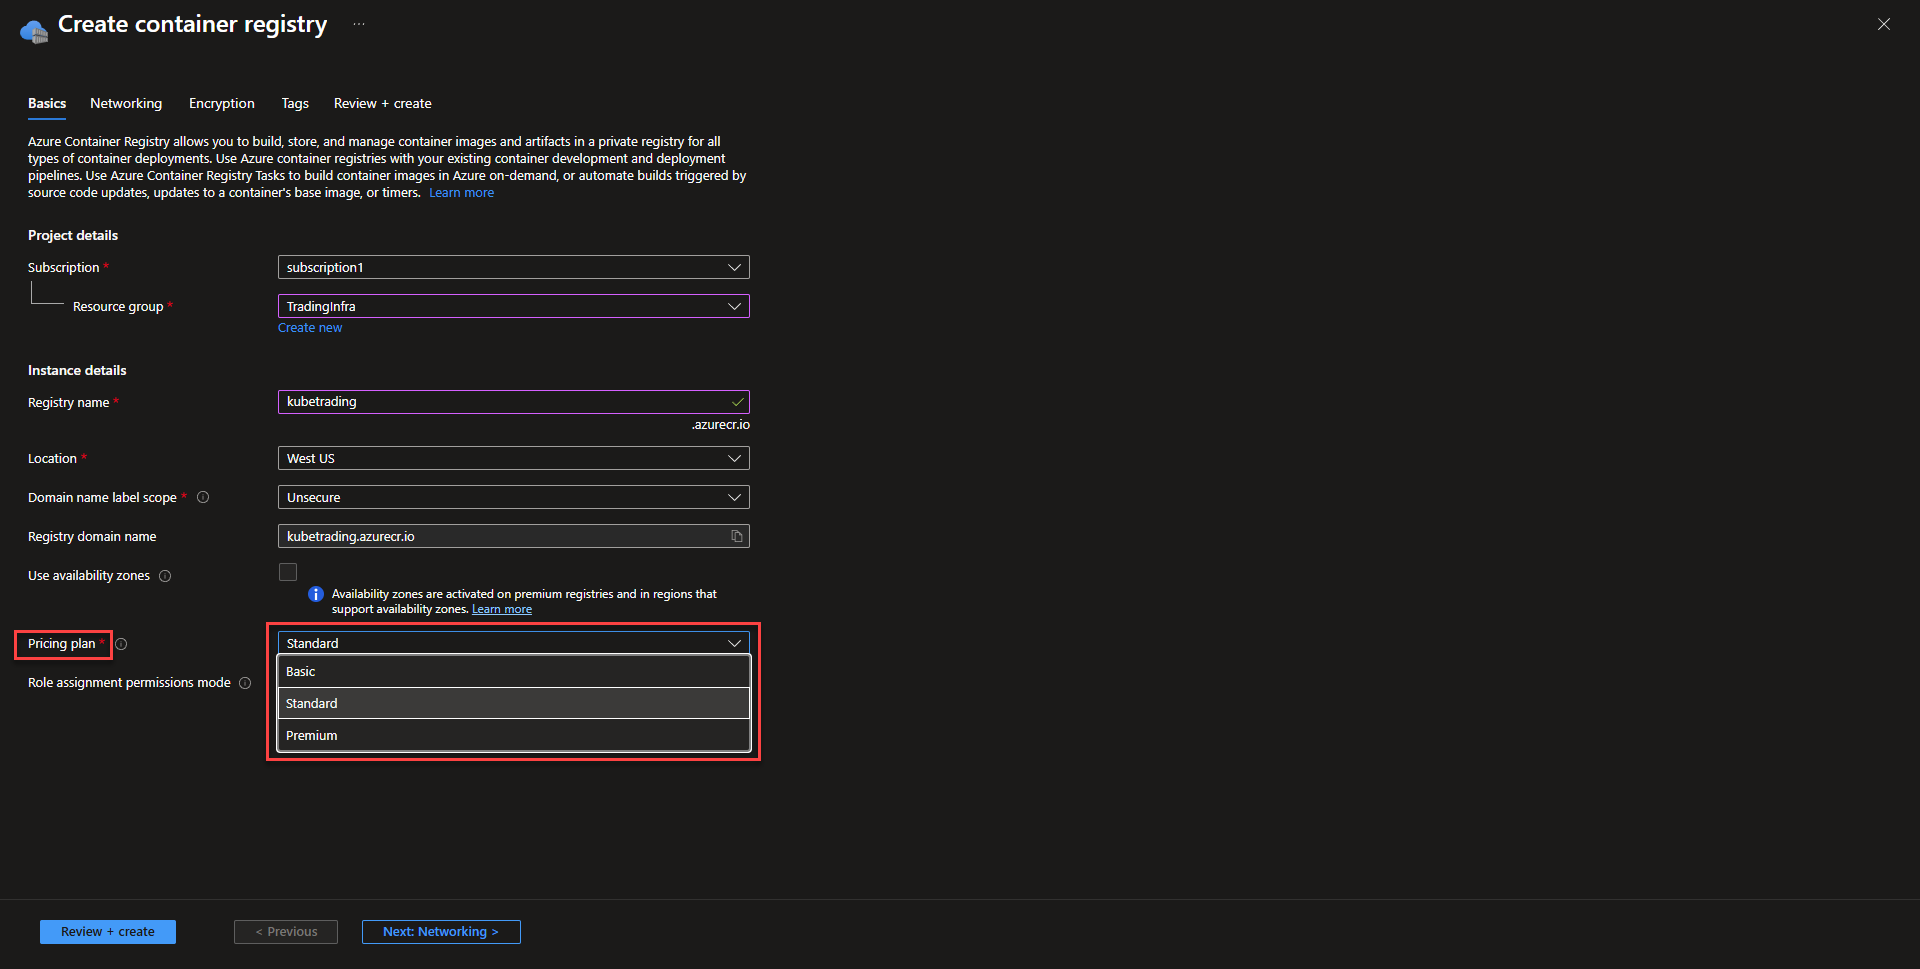
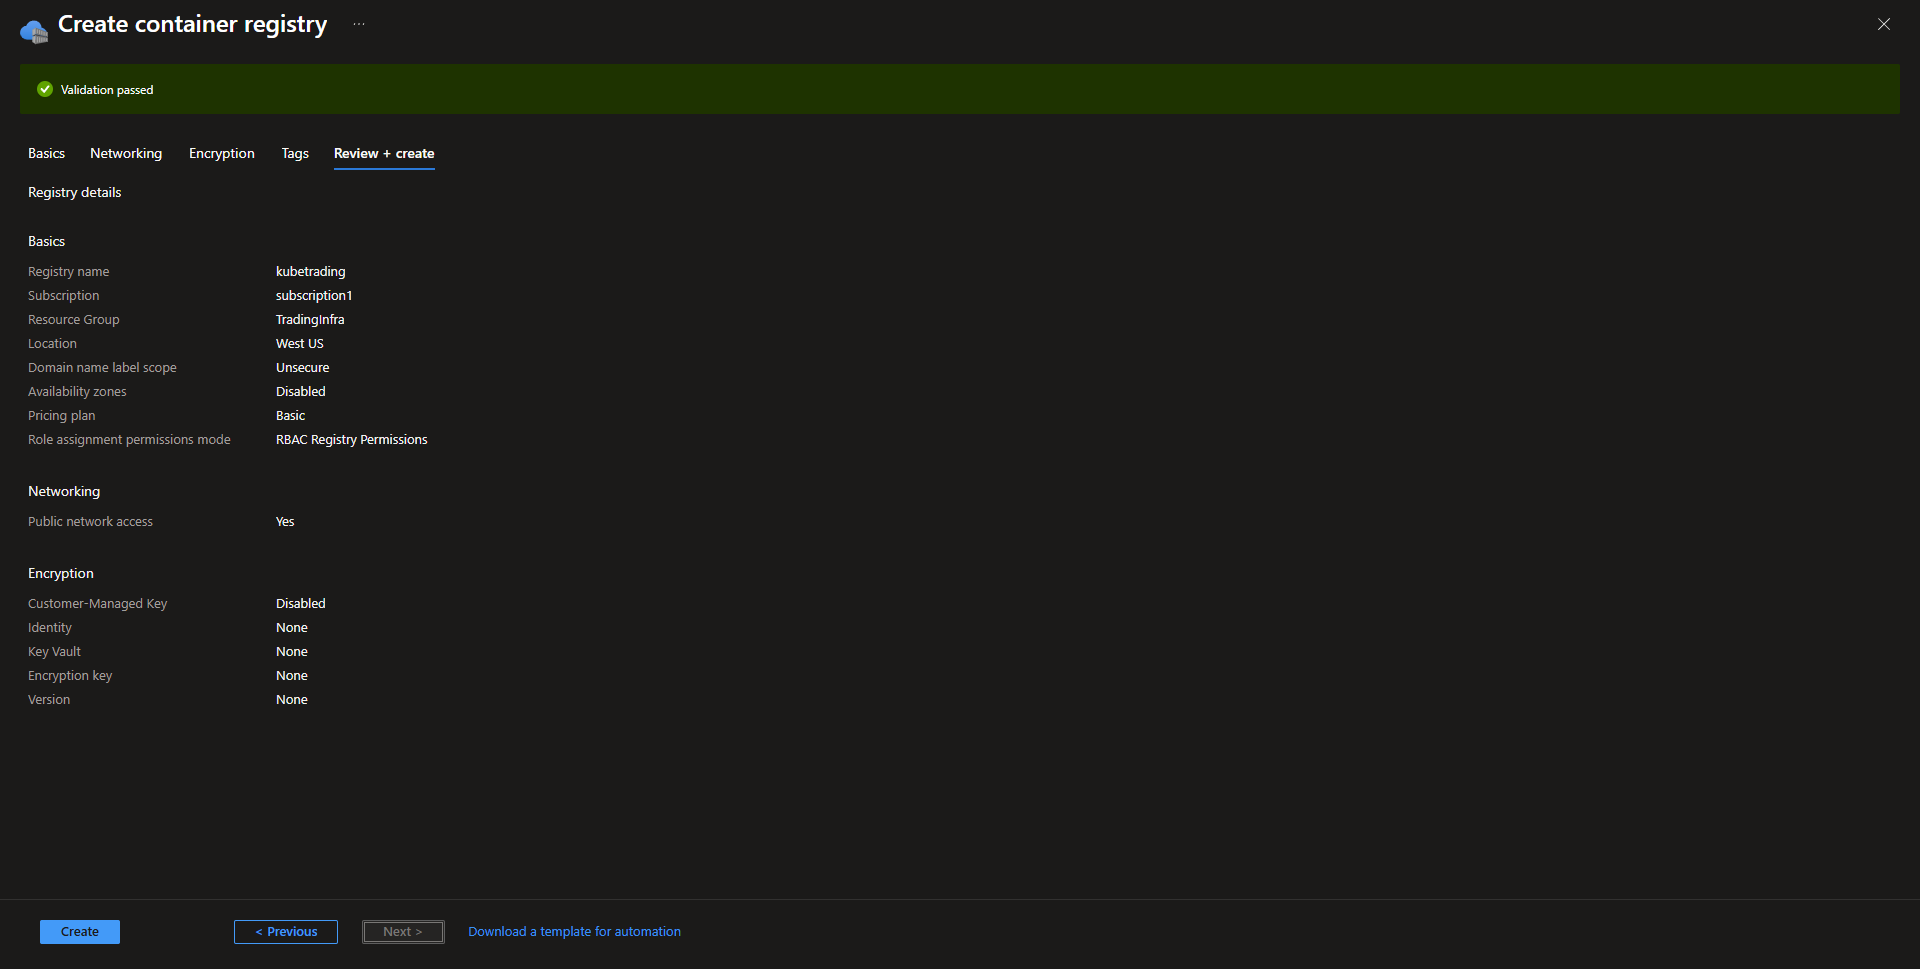
- Basics Select subscription, resource group, name the registry, and select the ACR location.
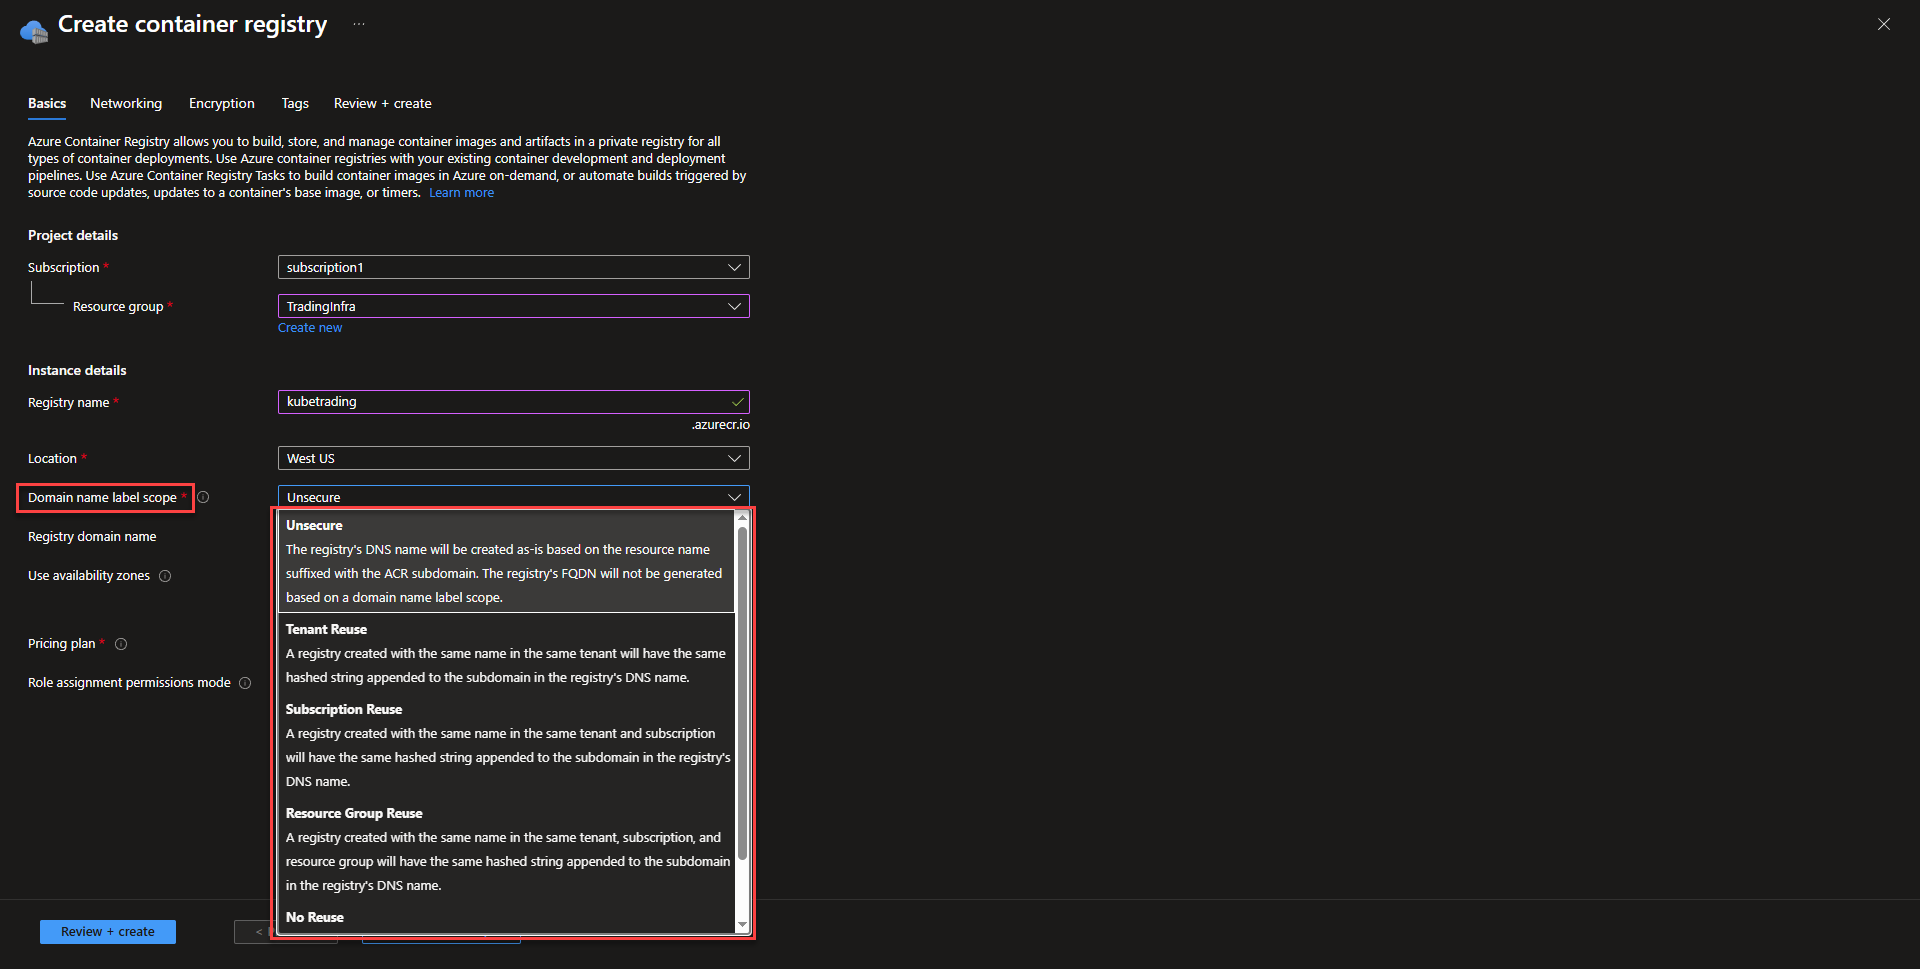
Changing the Domain name label scope can prevent other people from using the same domain name in instances of redeploying the registry. This can be a common security attack and more on that can be found on Microsoft’s blog post.
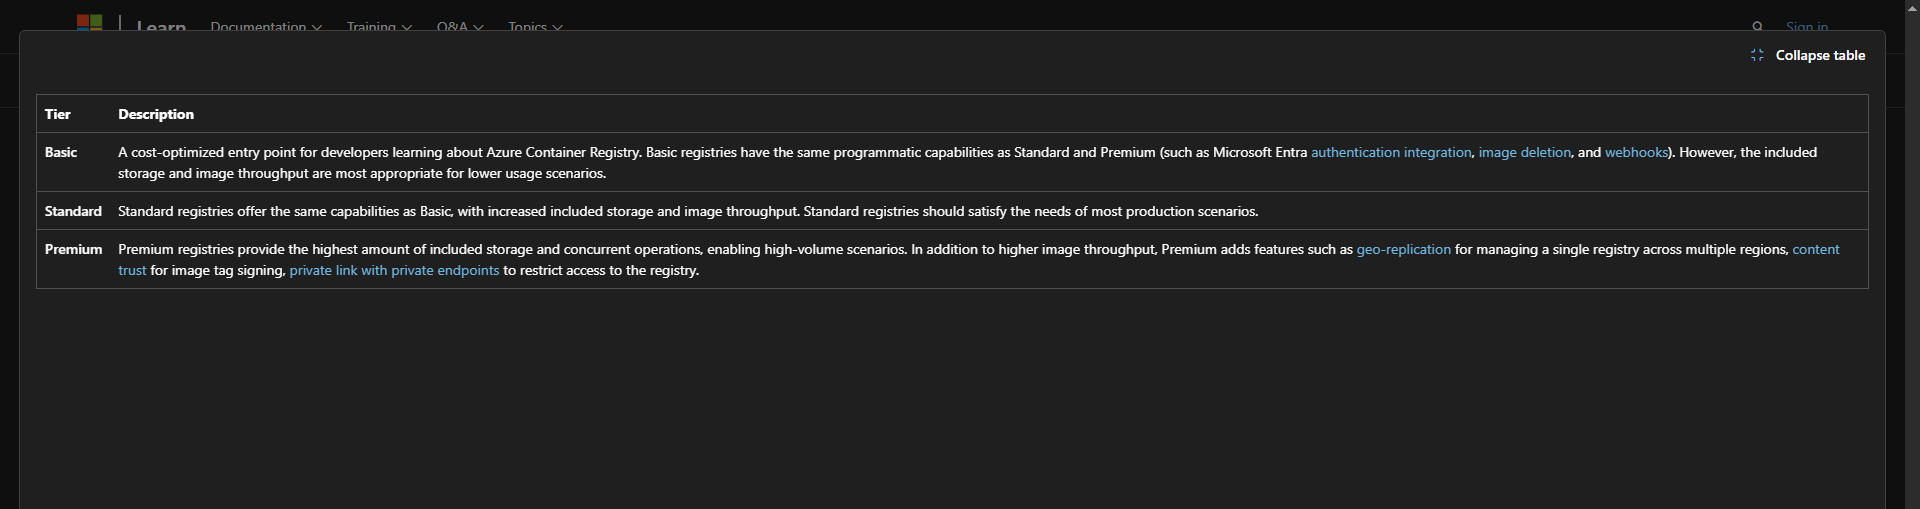
Using the premium tier allows the use of multiple availability zones as well as private networking directly to vnet. Standard deployment will be the enough for most deployments, as ACR isn’t as mission critical as resources that are running the application. That might be different for specialized organizations that have higher requirements.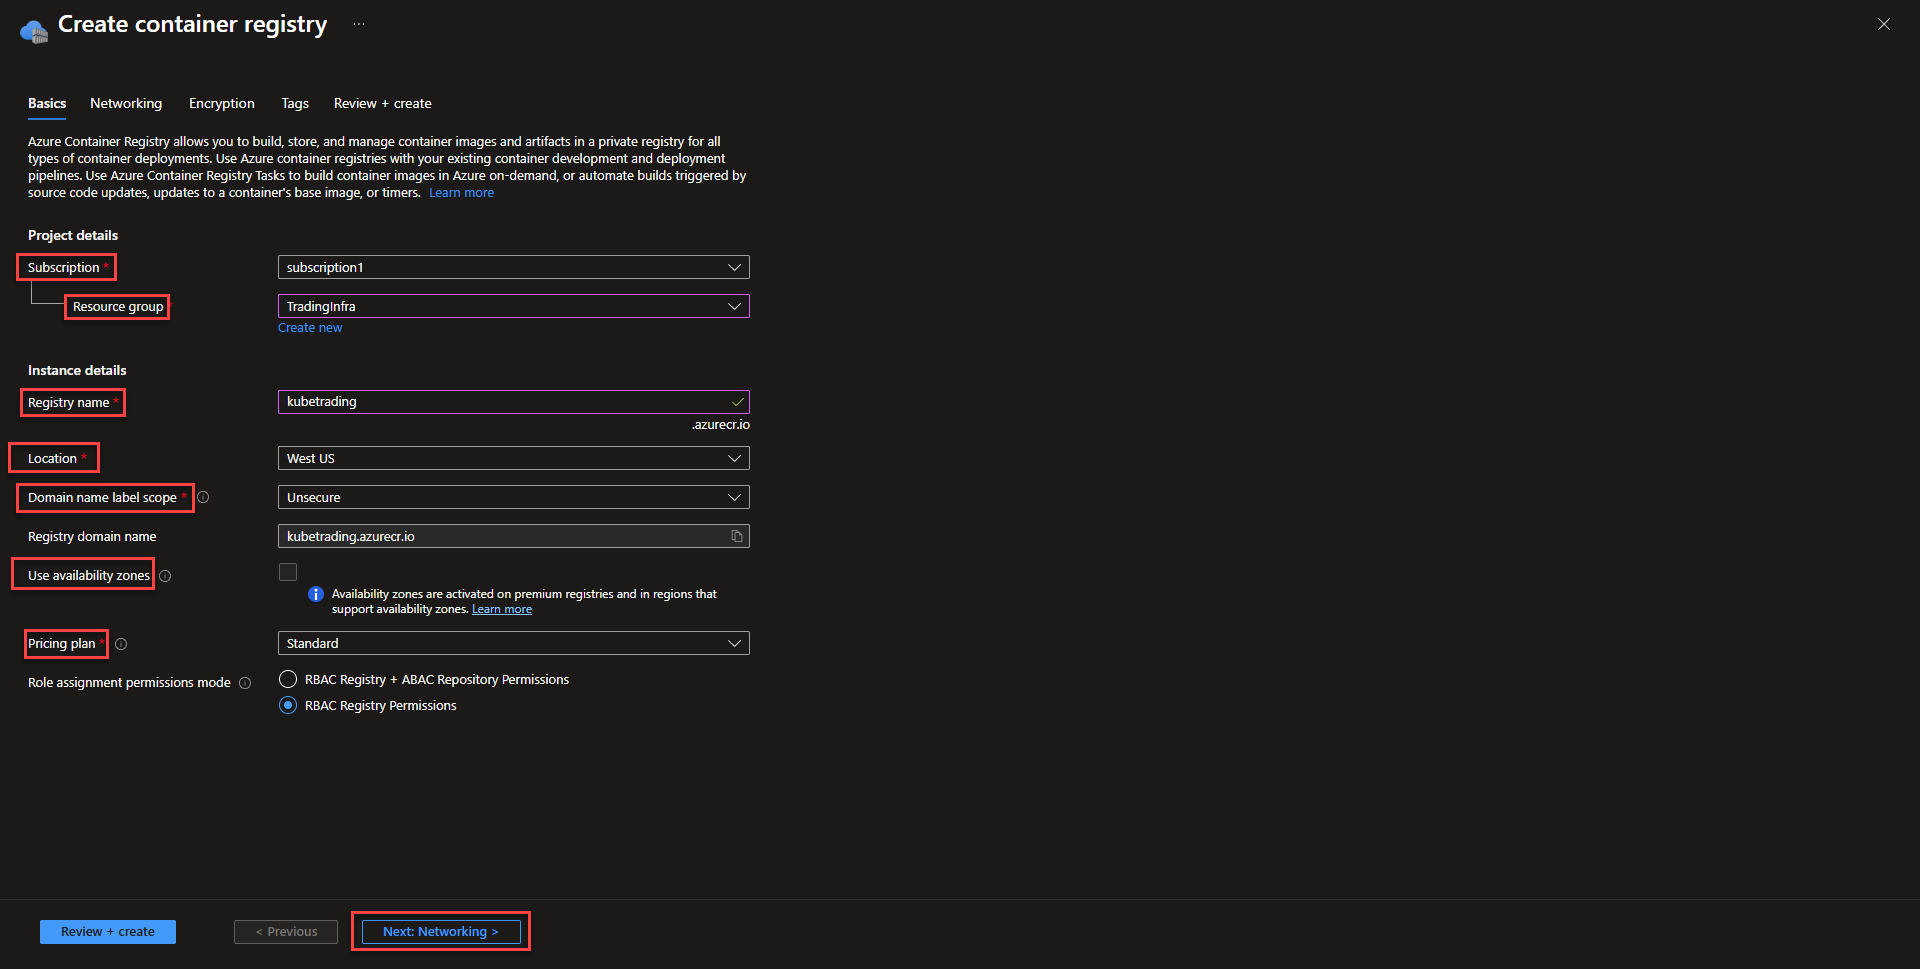
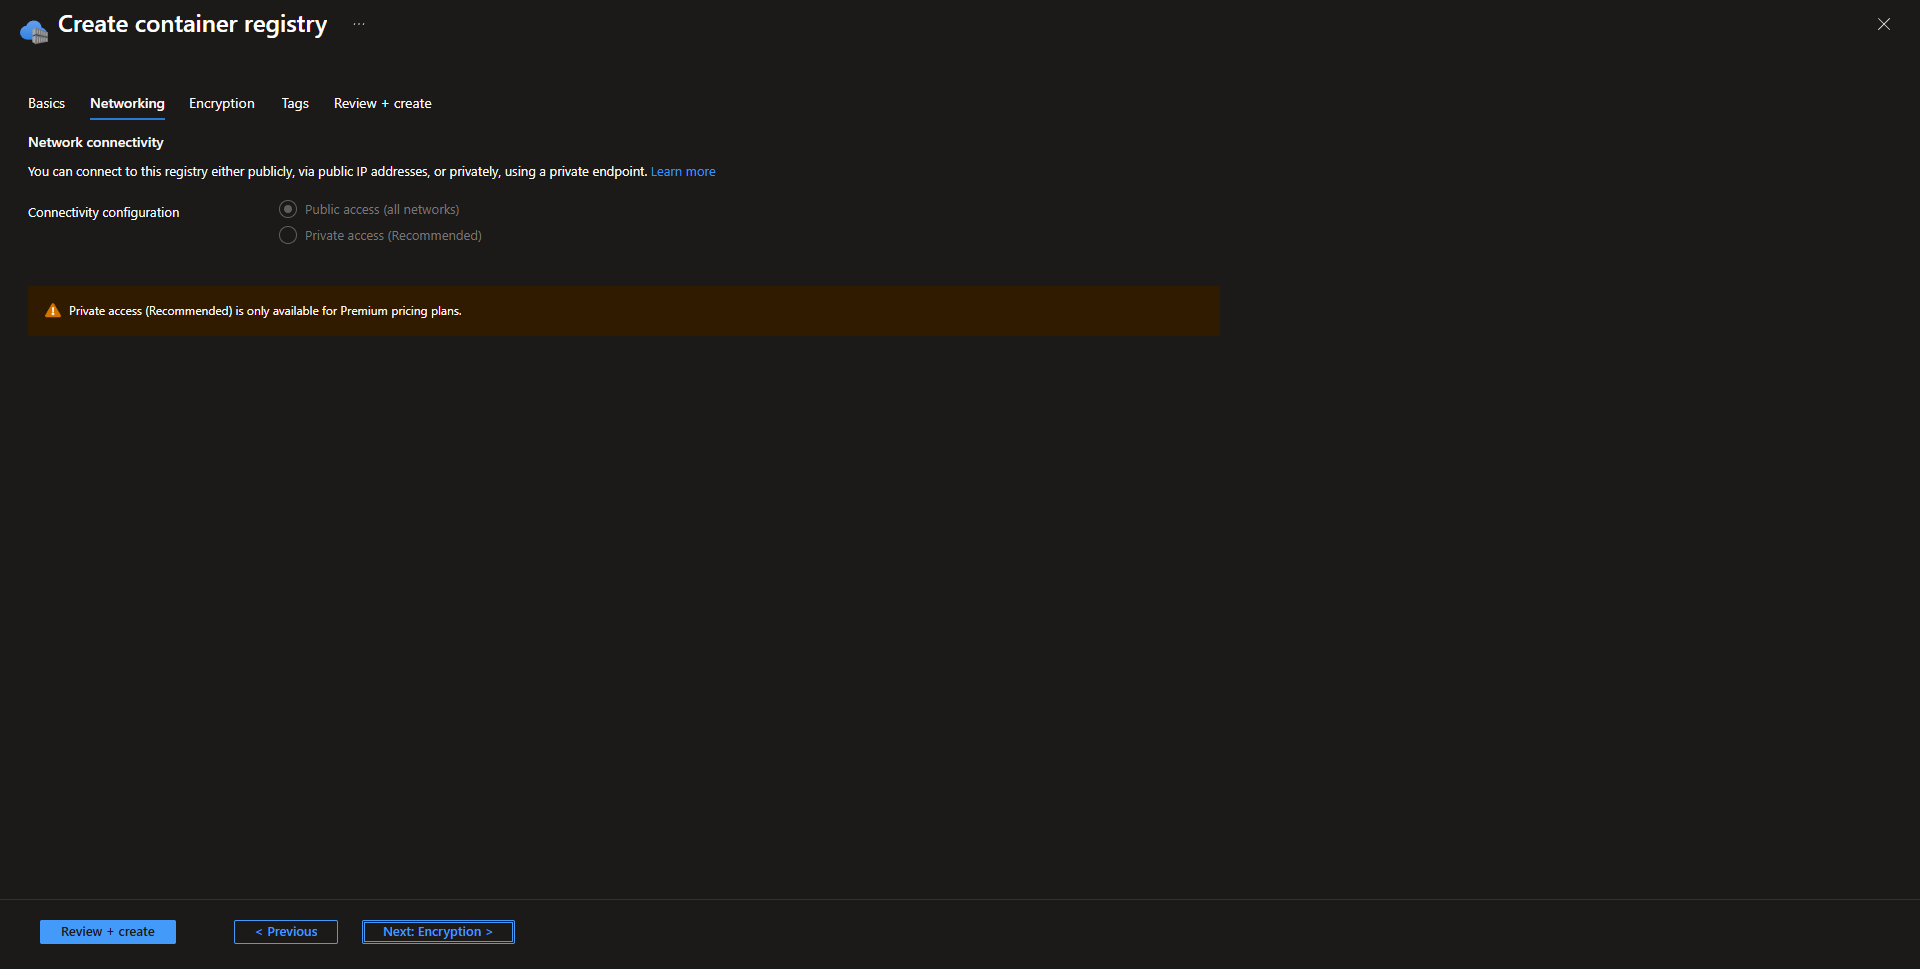
- Networking For basic or standard deployments, keep this page as default. For premium deployments, private access can be enabled.
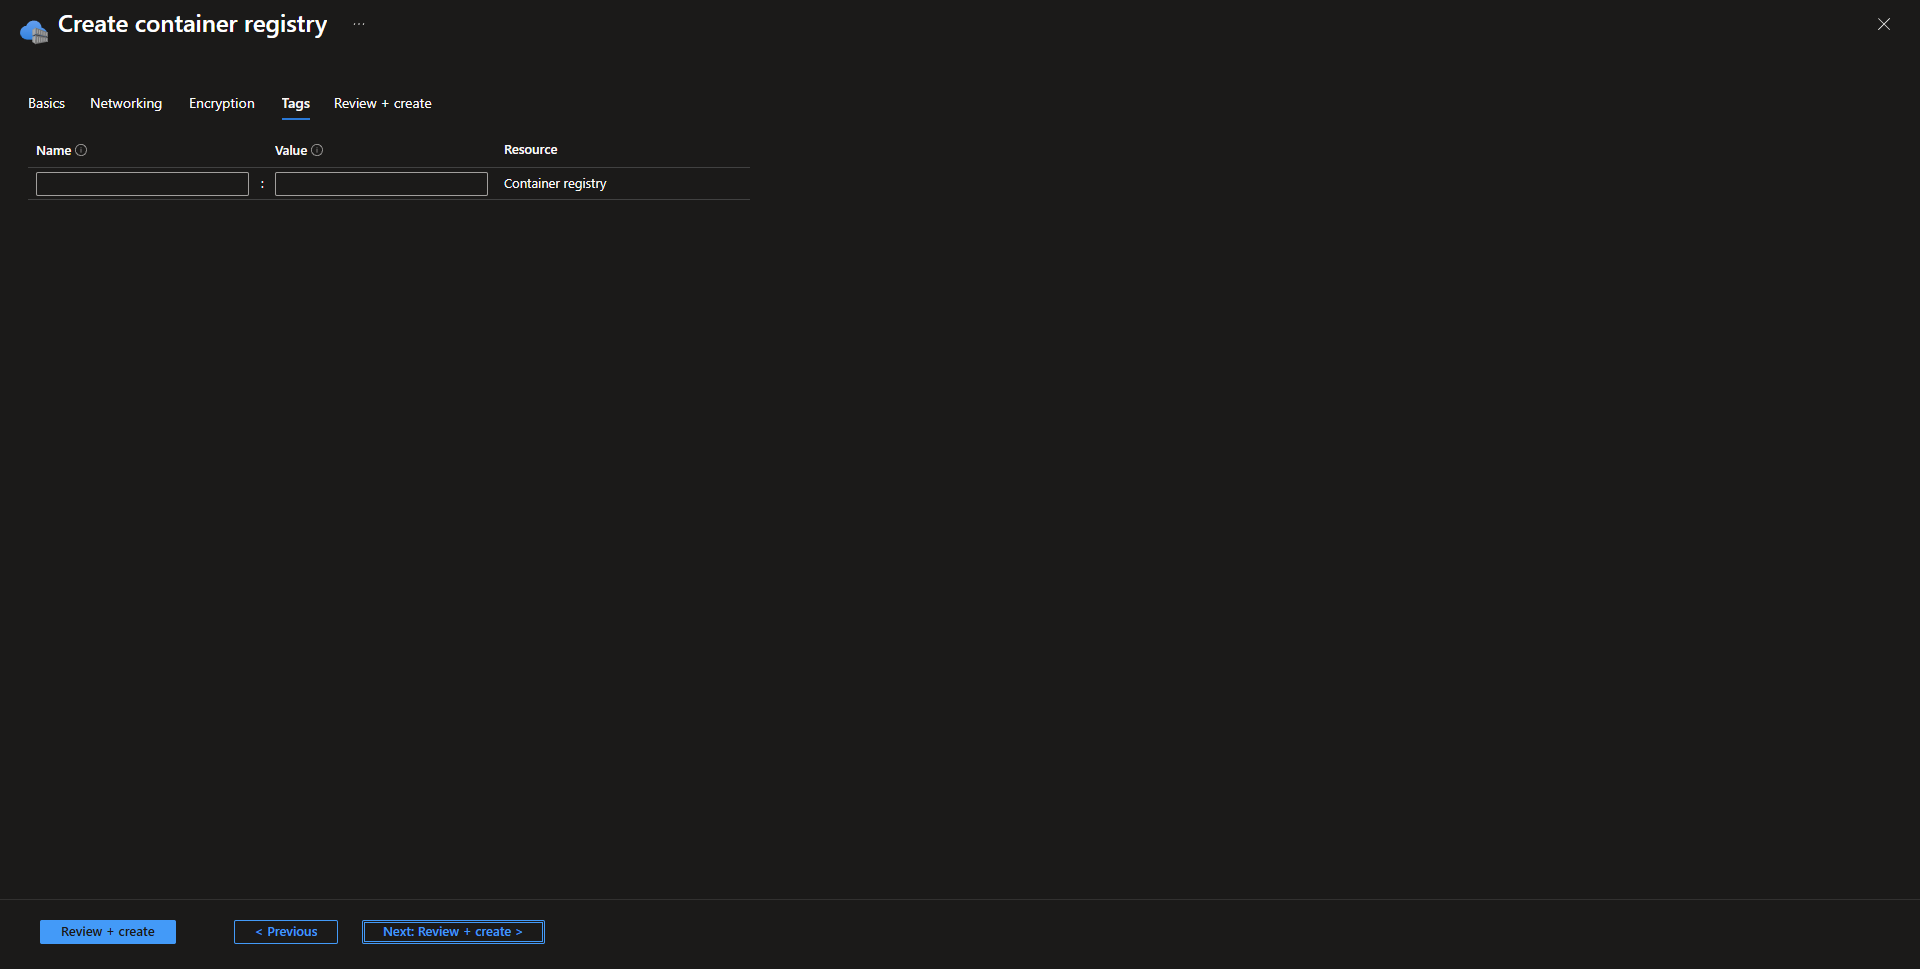
- Tag resource as desired and select create to finish registry deployment.
Create Azure Keyvault
- Select subscription and resource group. Enter a name fore the Key Vault. Key Vault names must be globally unique across tenets. See the Microsoft Key Vault pricing page for more info on pricing tiers. The last two options allow changing deleted vaults retention and purge protection for deleted vaults. Select next.

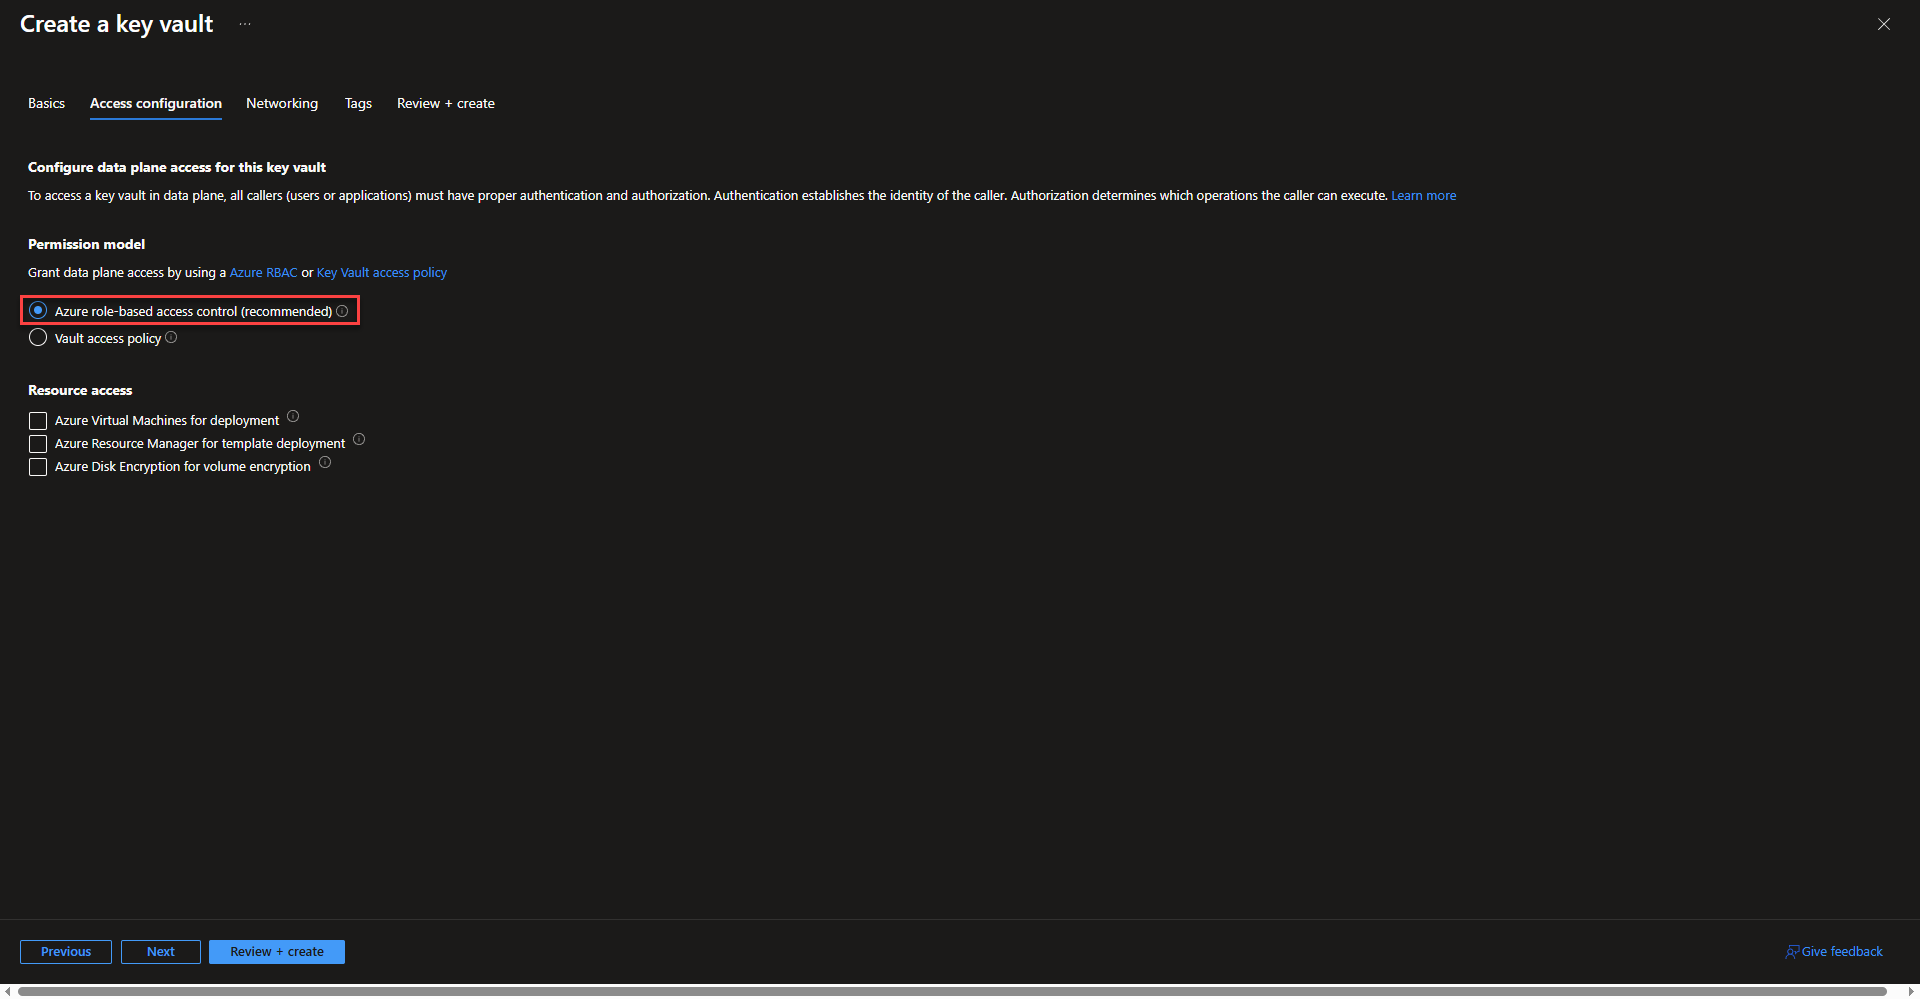
- On the access configuration tab, keep Azure role based access control selected. This is the standard recommended way to manage permissions integrating into existing rbac management workflows. The options under resource access will not be needed.
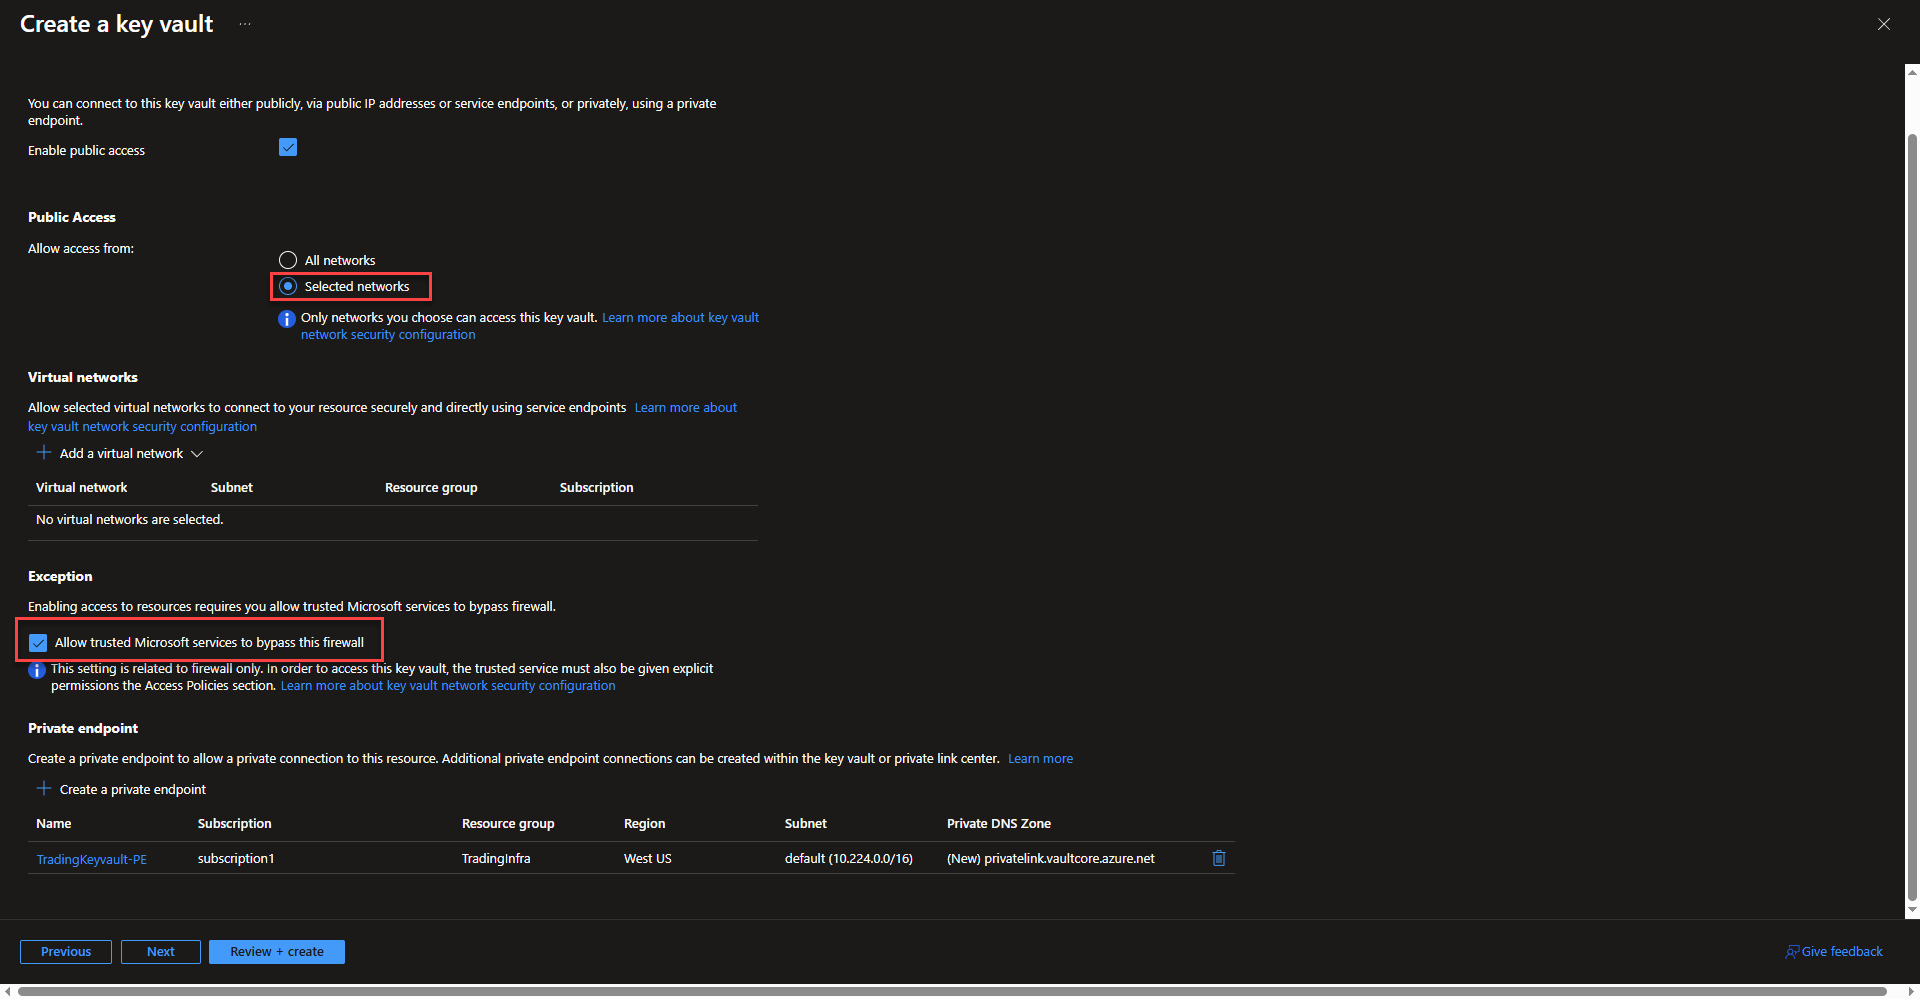
- On the networking tab, change allow access from to selected networks and select Allow trusted Microsoft services to bypass this firewall, which will allow Keyvault access from the Azure Portal.
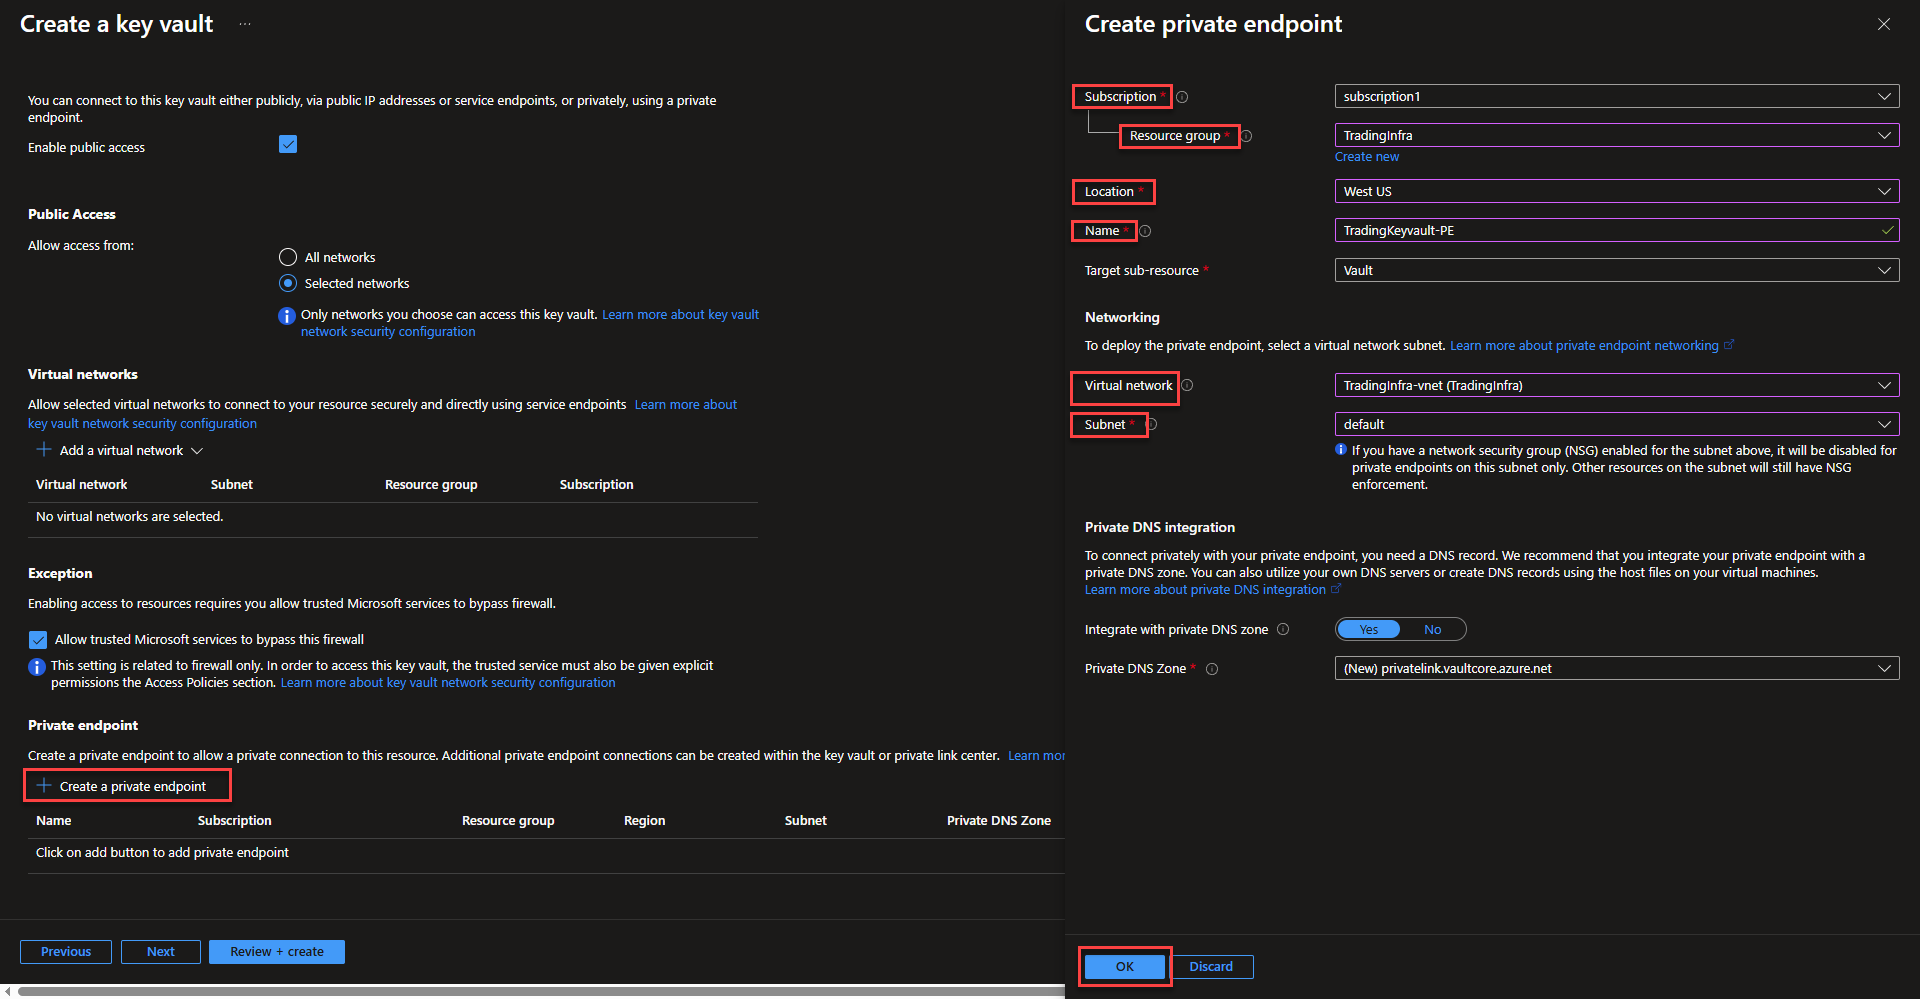
- Select create private endpoint to integrate the Key Vault into a vnet that can communicate with AKS. Select subscription, resource group, location, and name the private endpoint. Select the same virtual network as the Key Vault and select the subnet that the endpoint will be applied to. Azure will automatically integrate the domain name with a private DNS zone. Select ok and continue onto the next page of the configuration once the private endpoint is created.
- On the next page, create tags as desired and continue on to create the Key Vault.
Creation of the AKS Cluster Resource
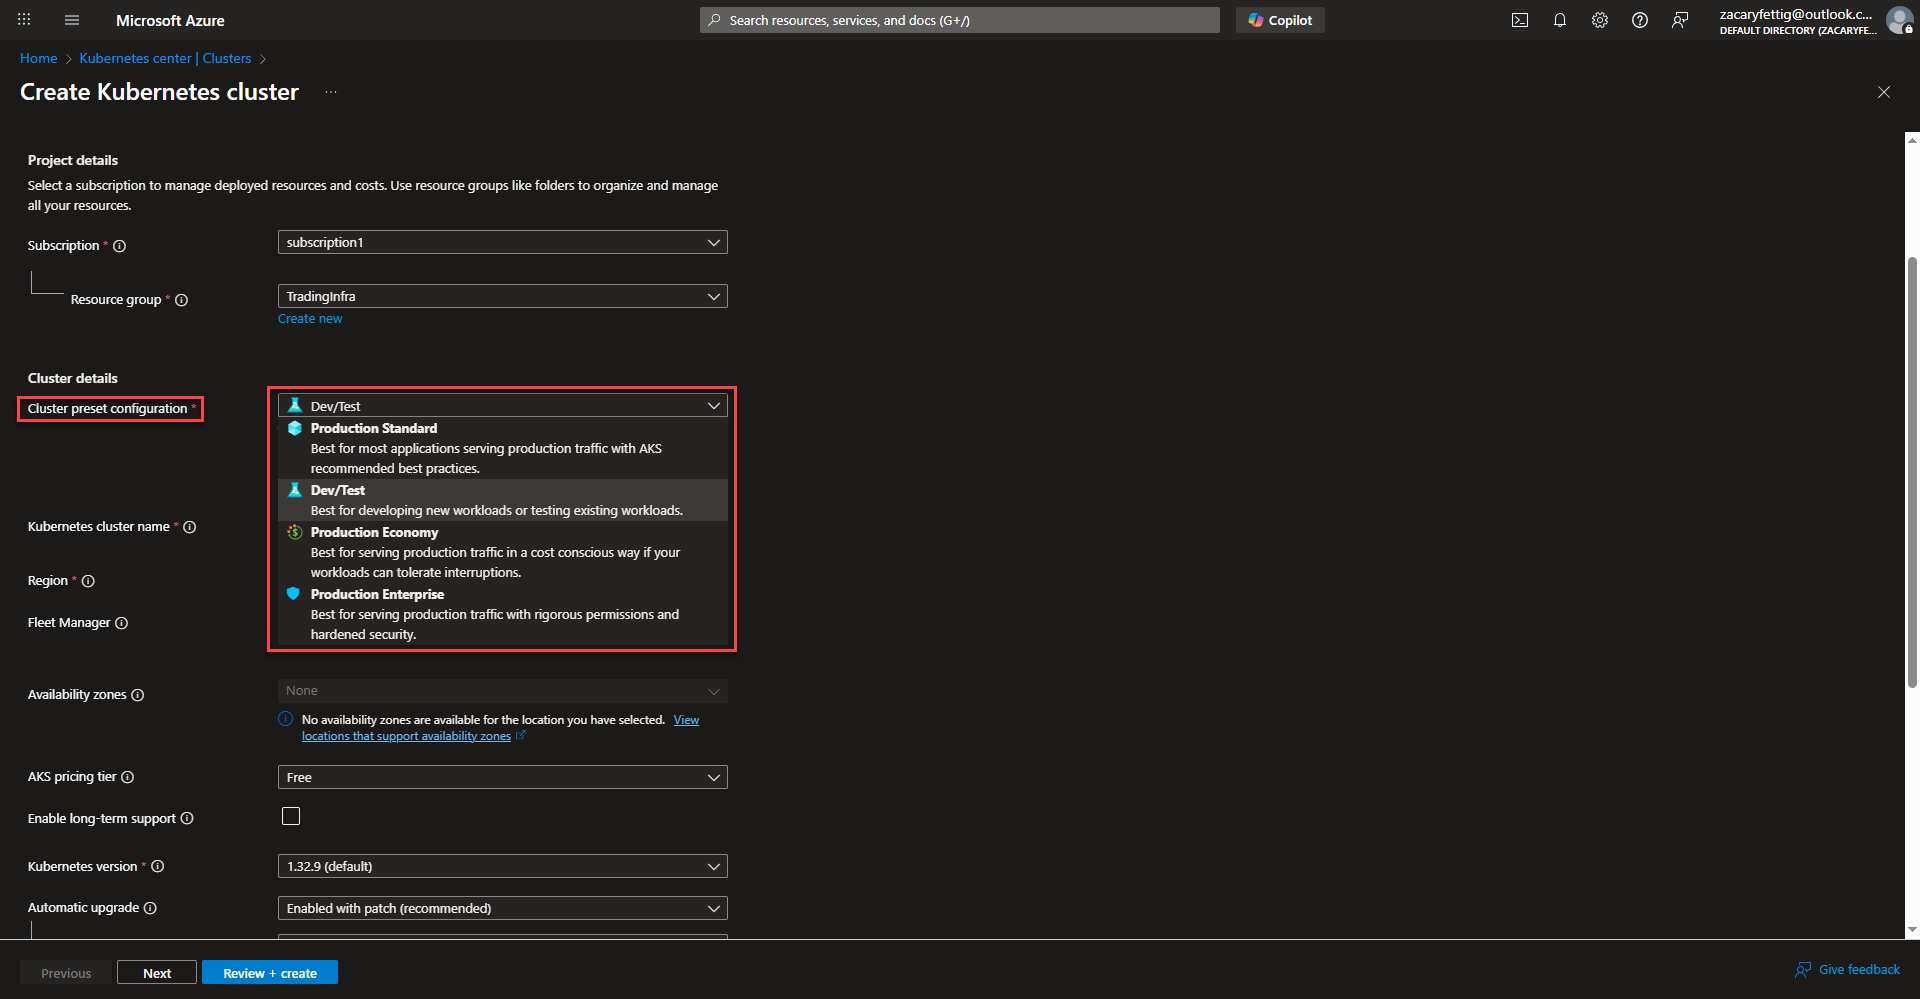
- Select the create button and select Kubernetes Cluster to start configuration.

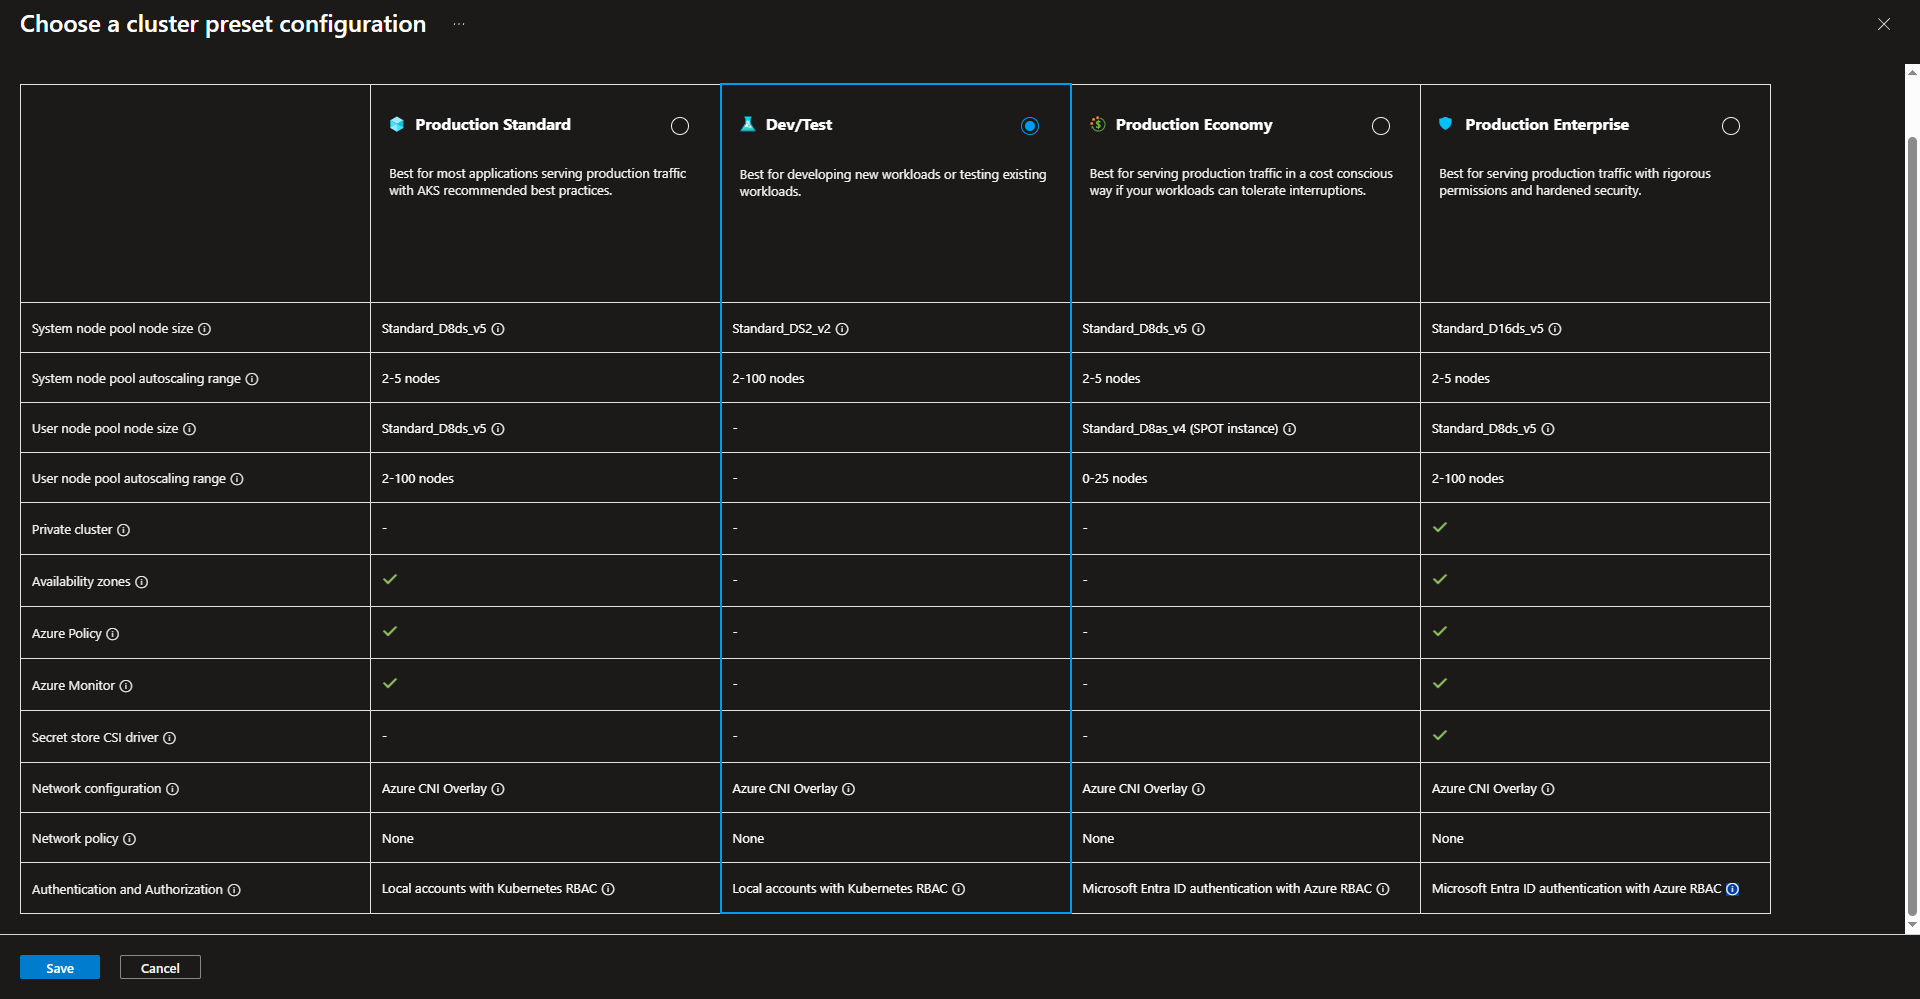
- Select subscription, resource group, and cluster preset configuration. The picture below provide more insight into the different options listed for selecting a cluster preset option.
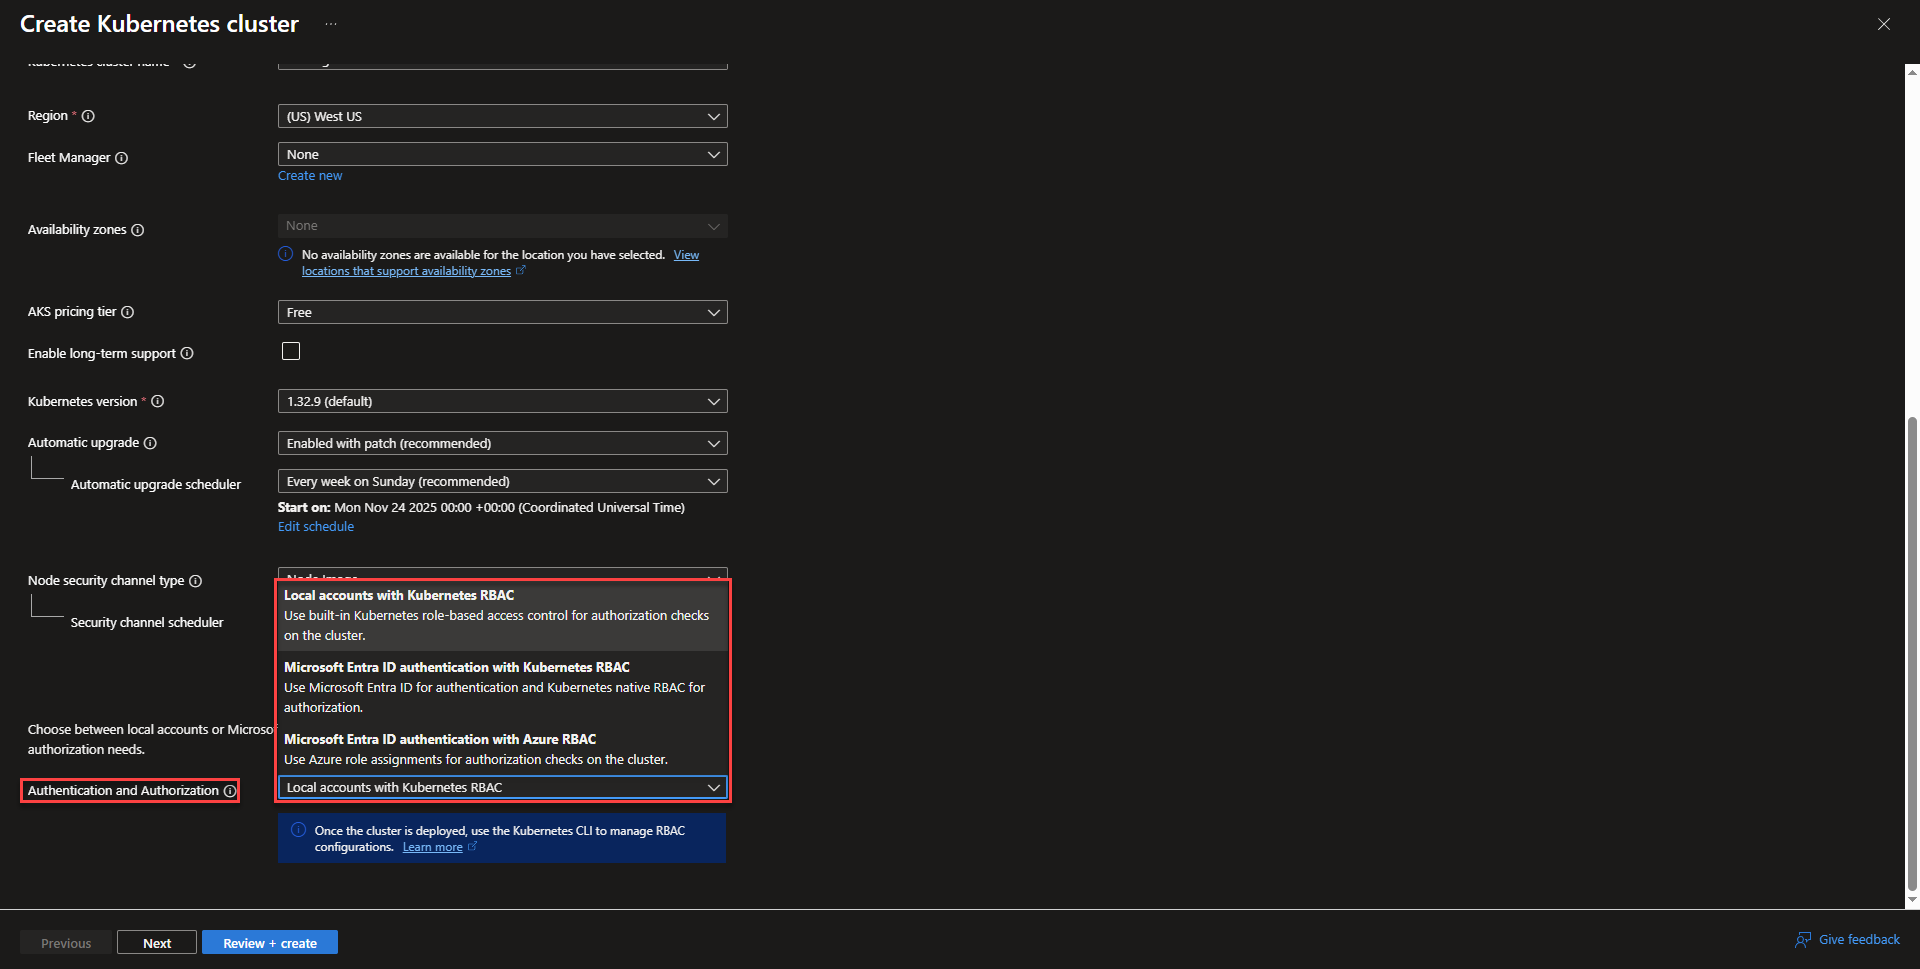
- Create a name for the cluster and select the region. Fleet manager is helpful for managing multiple clusters, but isn’t needed for this project. Select your availability zone preference. The picture below the configuration screenshot will give more information on the different pricing tiers to choose from.
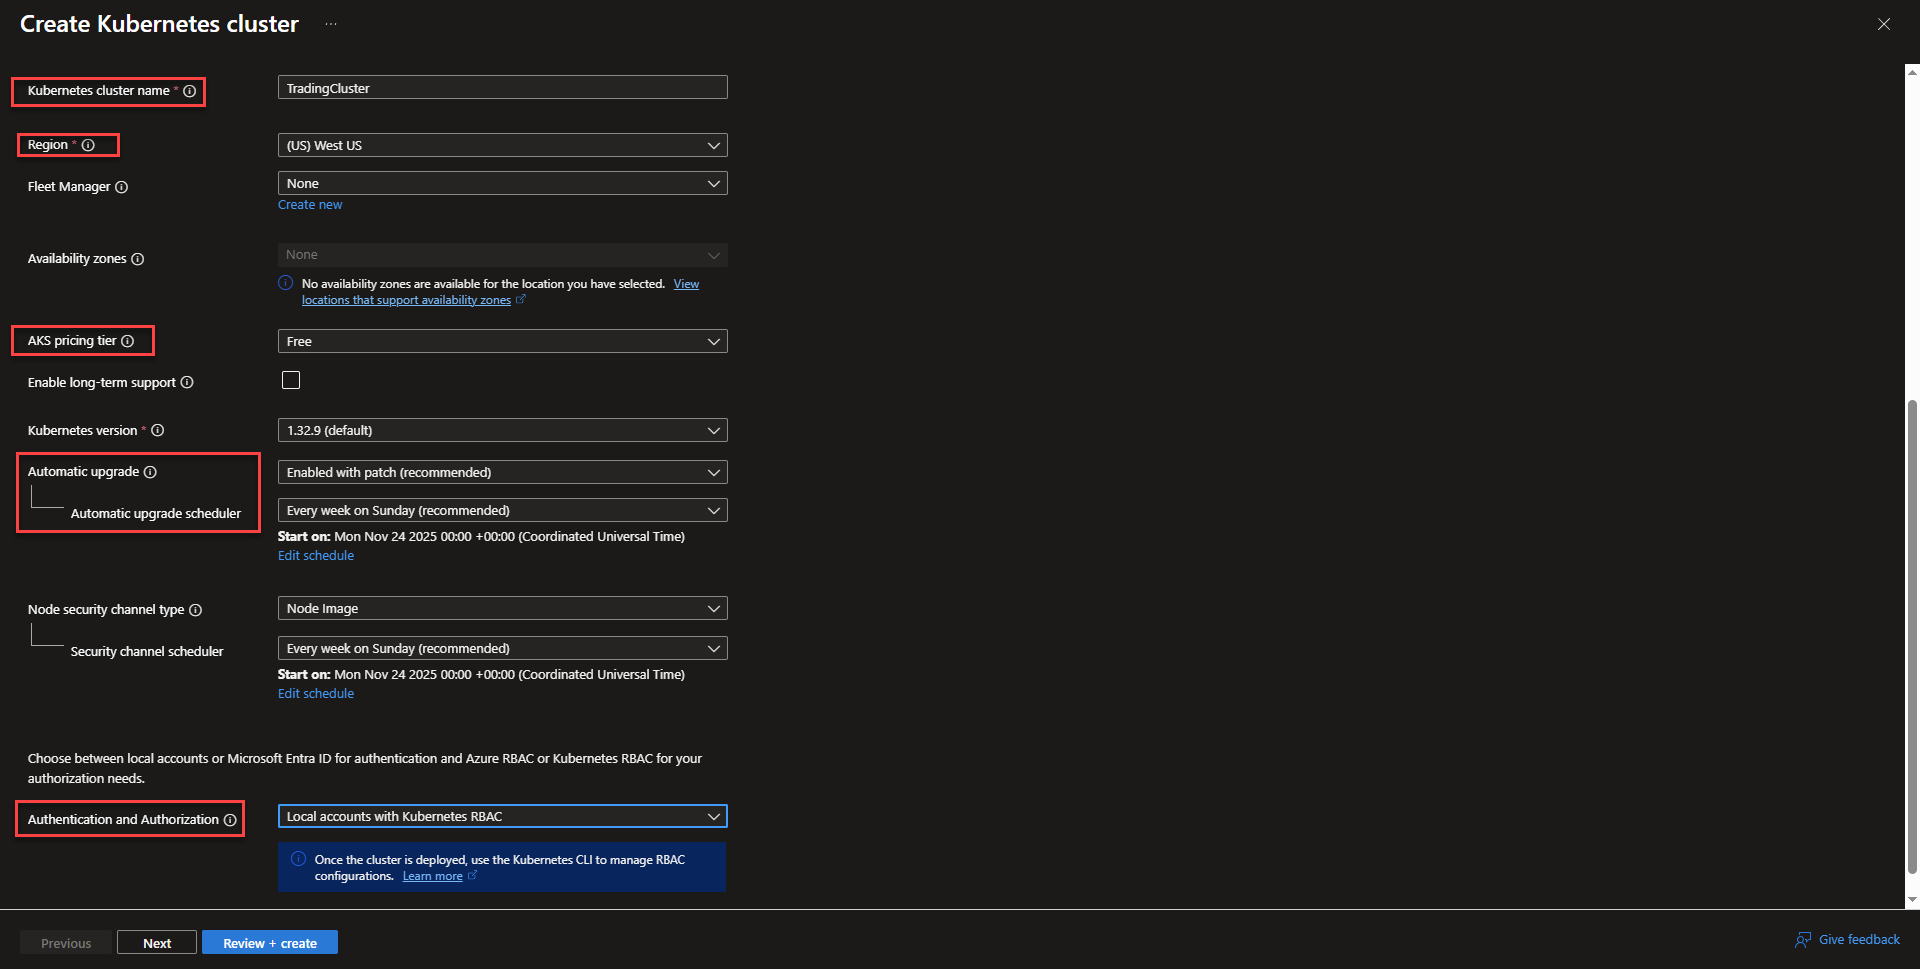

- Select cluster upgrade schedule or disable automatic updates. Below the upgrade scheduling options, Select an option for authentication. This section provides options for how other Azure resources are able to authenticate with the cluster.
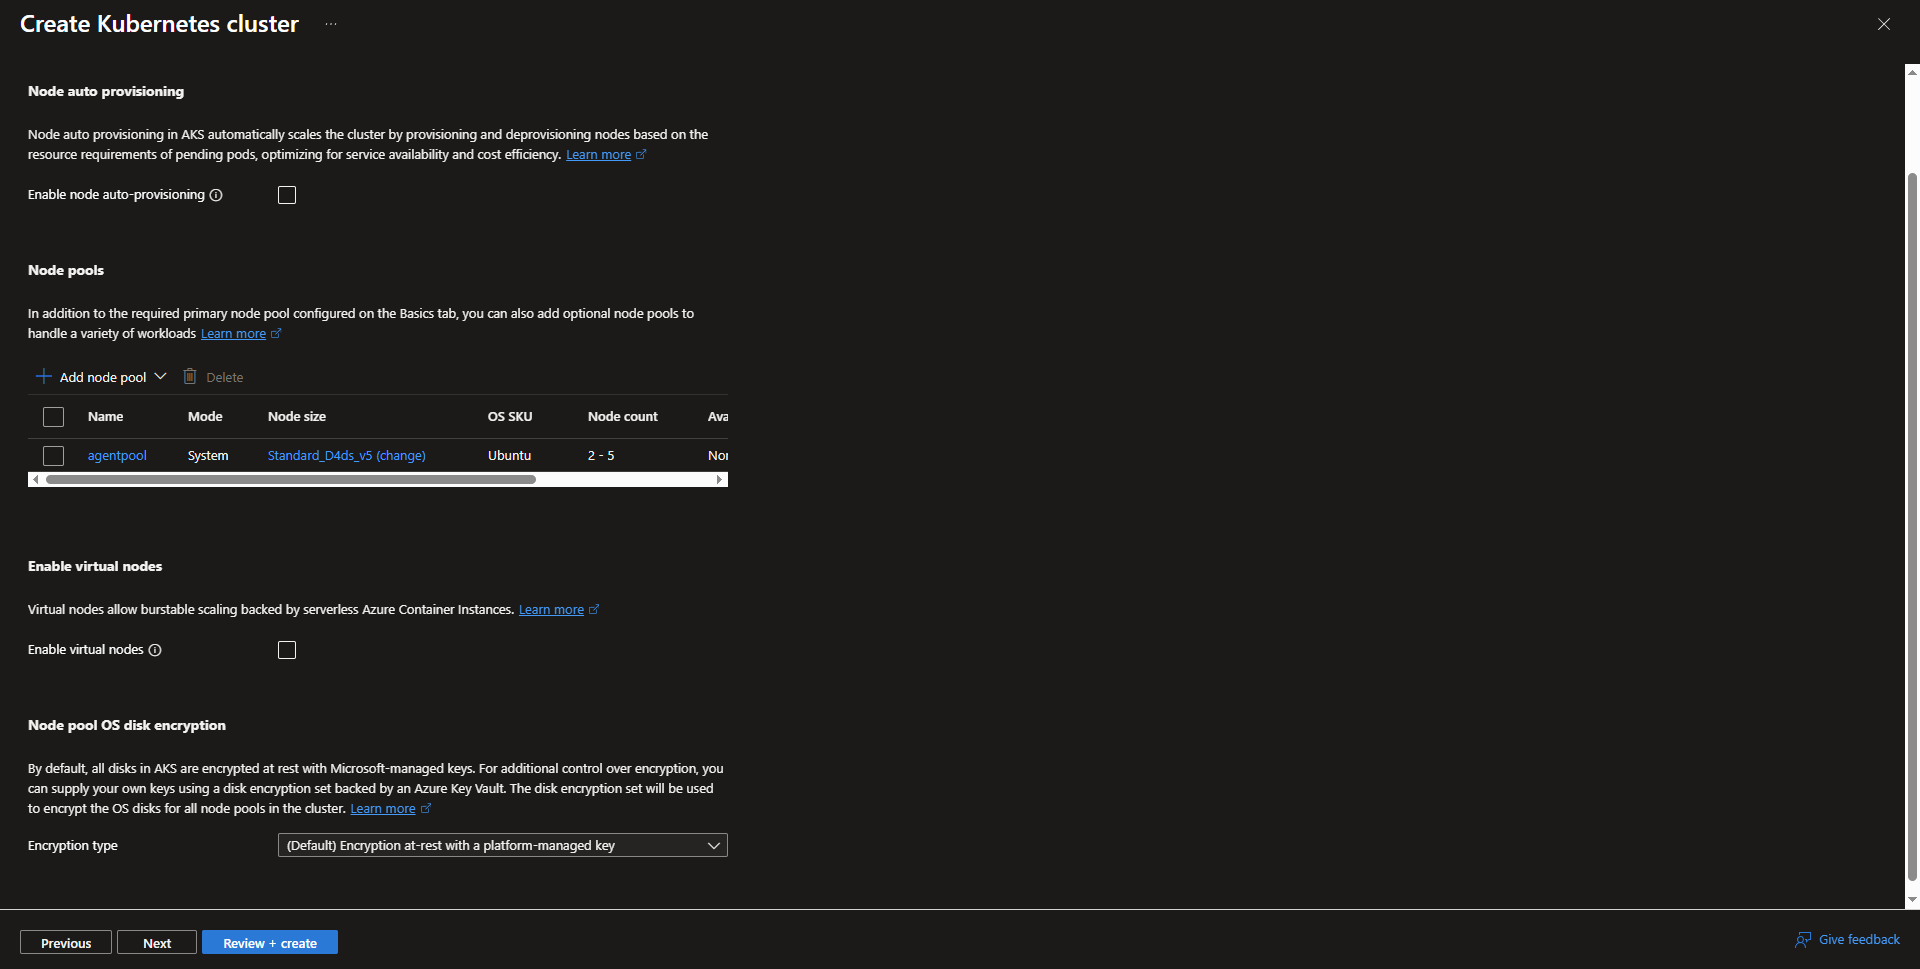
- Configure node pools. One default node pool is auto created and more can be configured. The size of the nodes can be configured. The max amount of pods per a node, OS, auto/manual scaling can be configured along with many of the other node settings by selecting the node pool. Creating a new node pool goes through the same configuration options.
- On the networking tab, enable private cluster. Private cluster doesn’t change node access to the internet, but it does close of the control plane endpoint from internet, which, leaves the cluster vulnerable to potential exploits that can access the control plane and take control of the cluster.

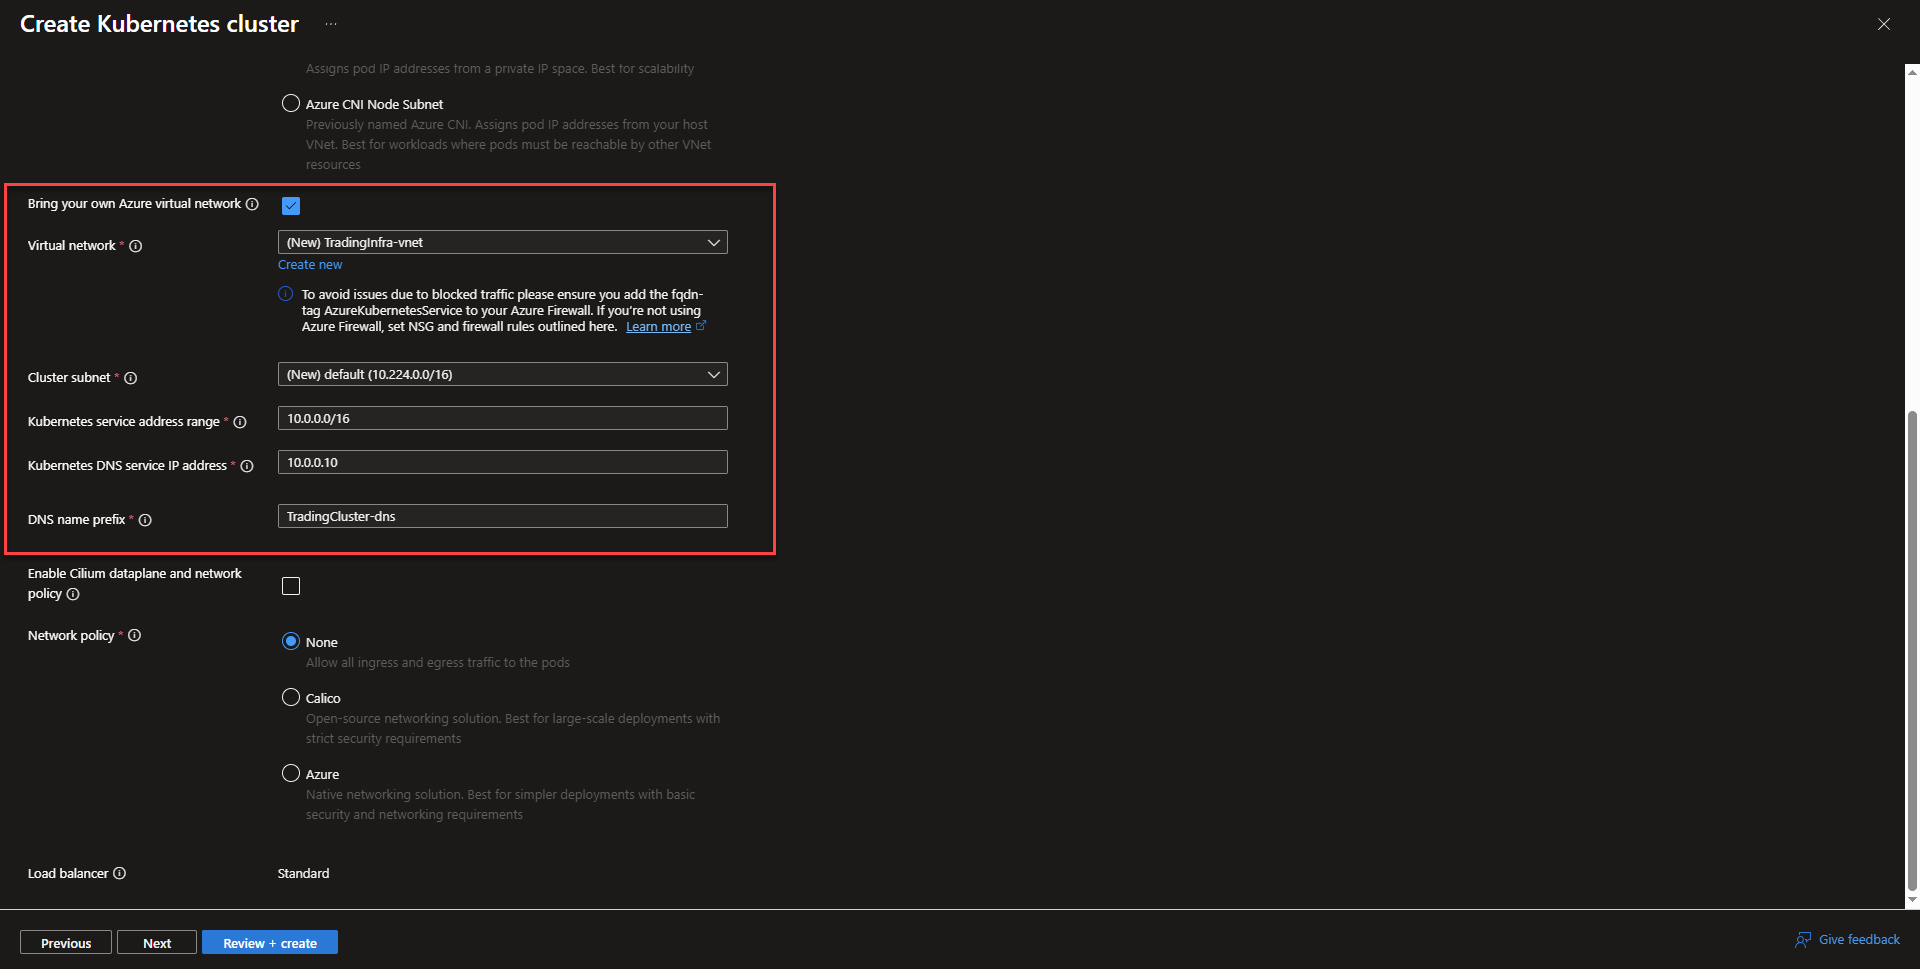
- Enable vnet integration by selecting bring your own Azure Virtual Network. It will make the connection to the vnet so that the cluster can communicate with other Azure Resources within the vnet.
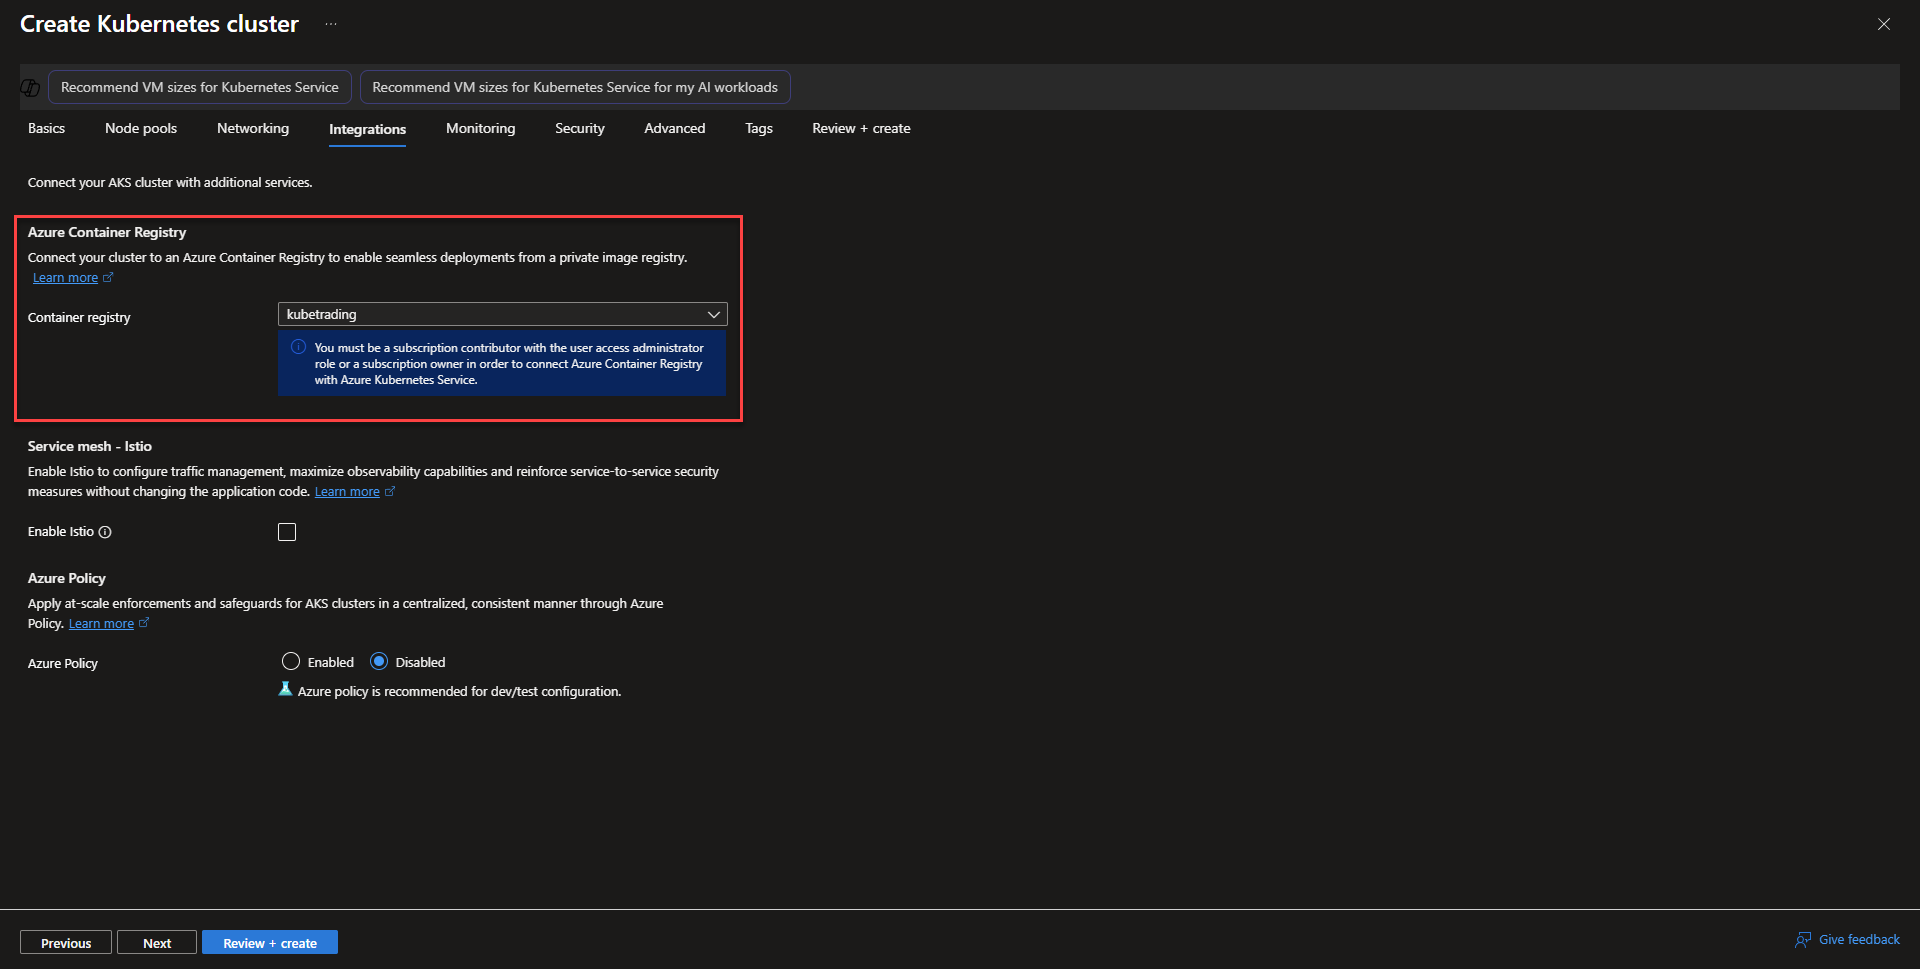
- On the Integrations page, select the Azure Container Registry created from before to allow the aks cluster to pull images from the registry. The rest of the options can be left as default, but Azure also provides a managed instance of Istio that can be auto deployed to the cluster when checked. Enabling Azure Policy can provide standardization across configuration settings and can audit/block settings compliance.
- On the Monitoring tab, deselect Prometheus. Managed Prometheus and Grafana can be activated in the menu or deployed manually through Kubernetes. In this project Kibana will be used for cluster and application logging.

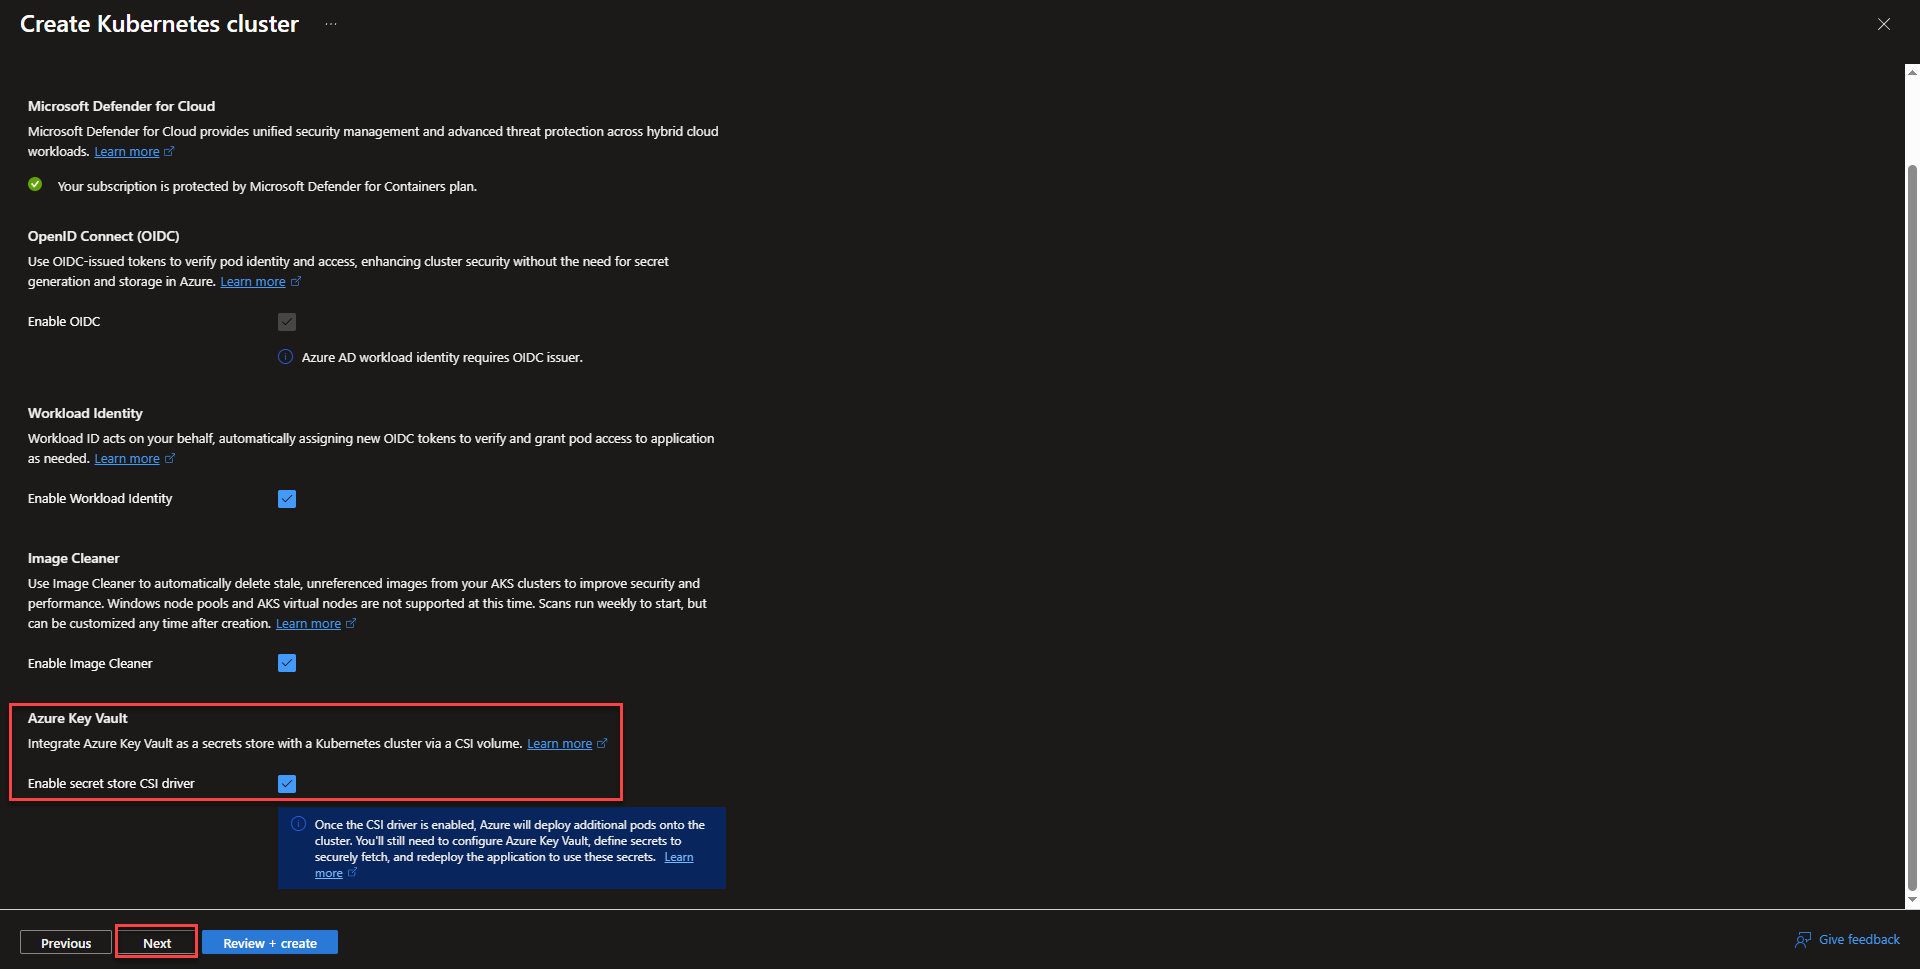
- On the Security tab, check the box next to Azure Key Vault. It will allow Azure Key Vault to become accessible within the cluster.
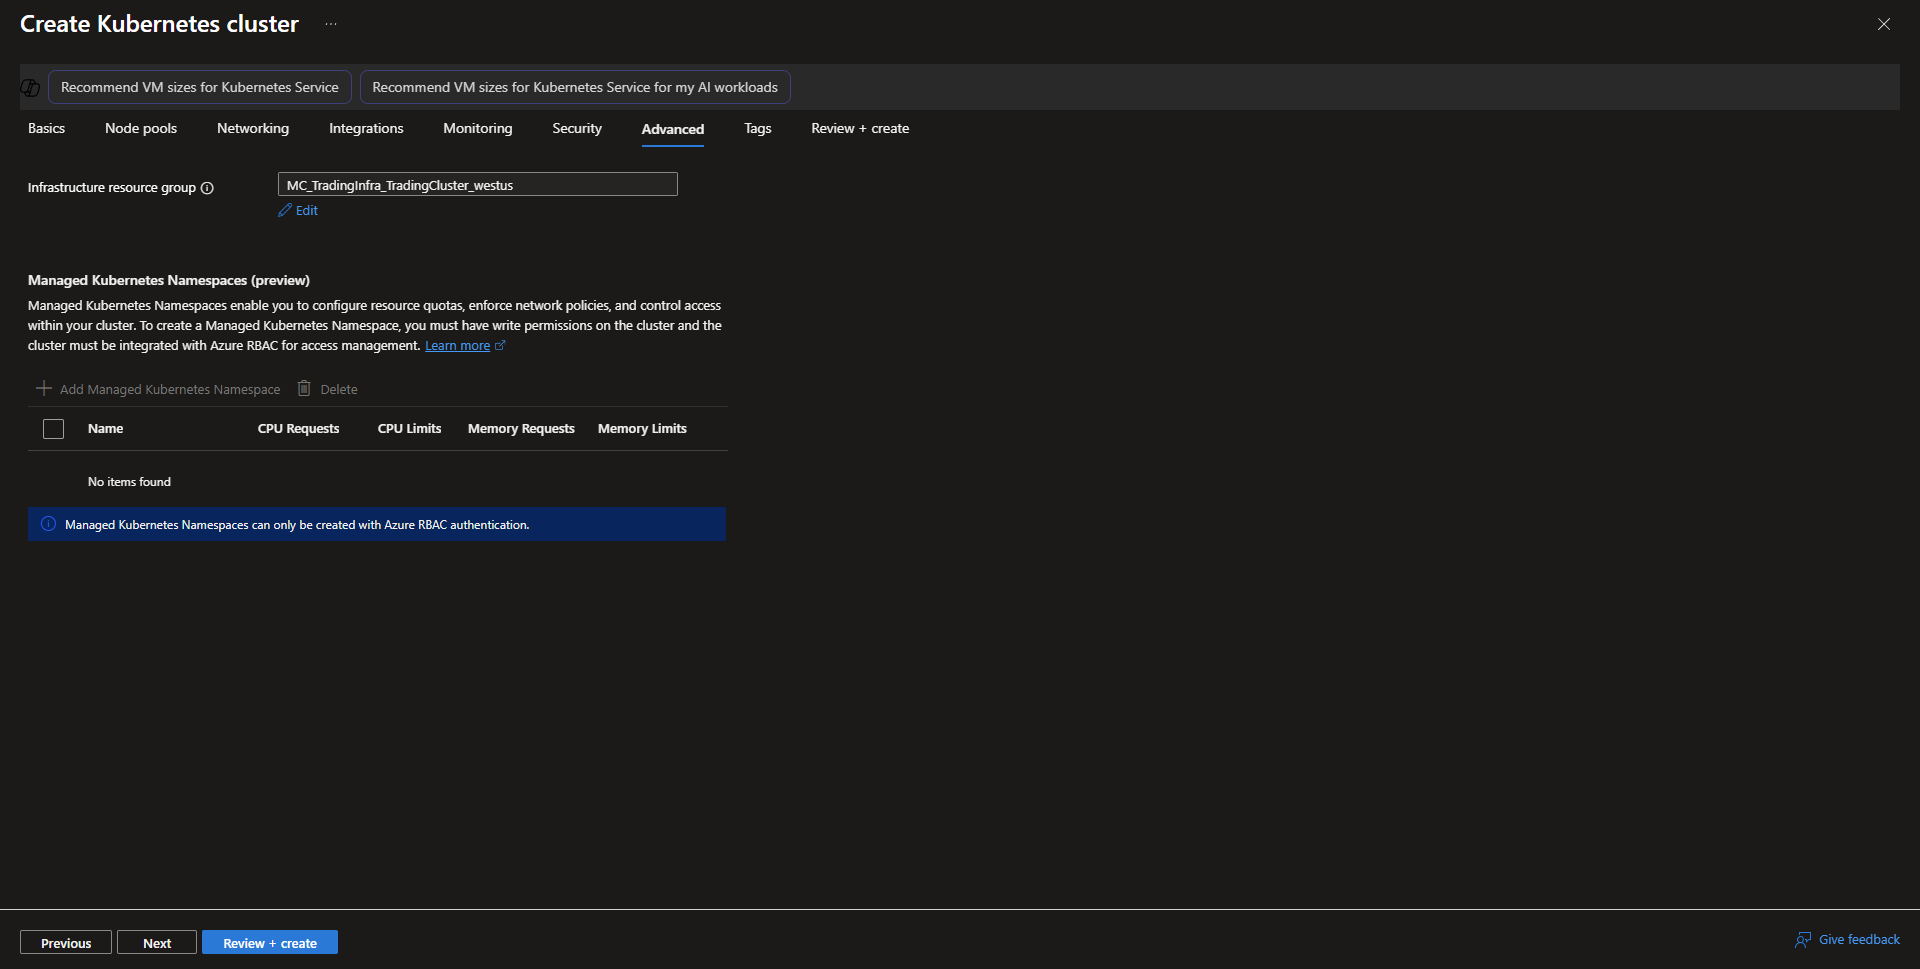
- On the advanced tab, keep the settings as default and select next.
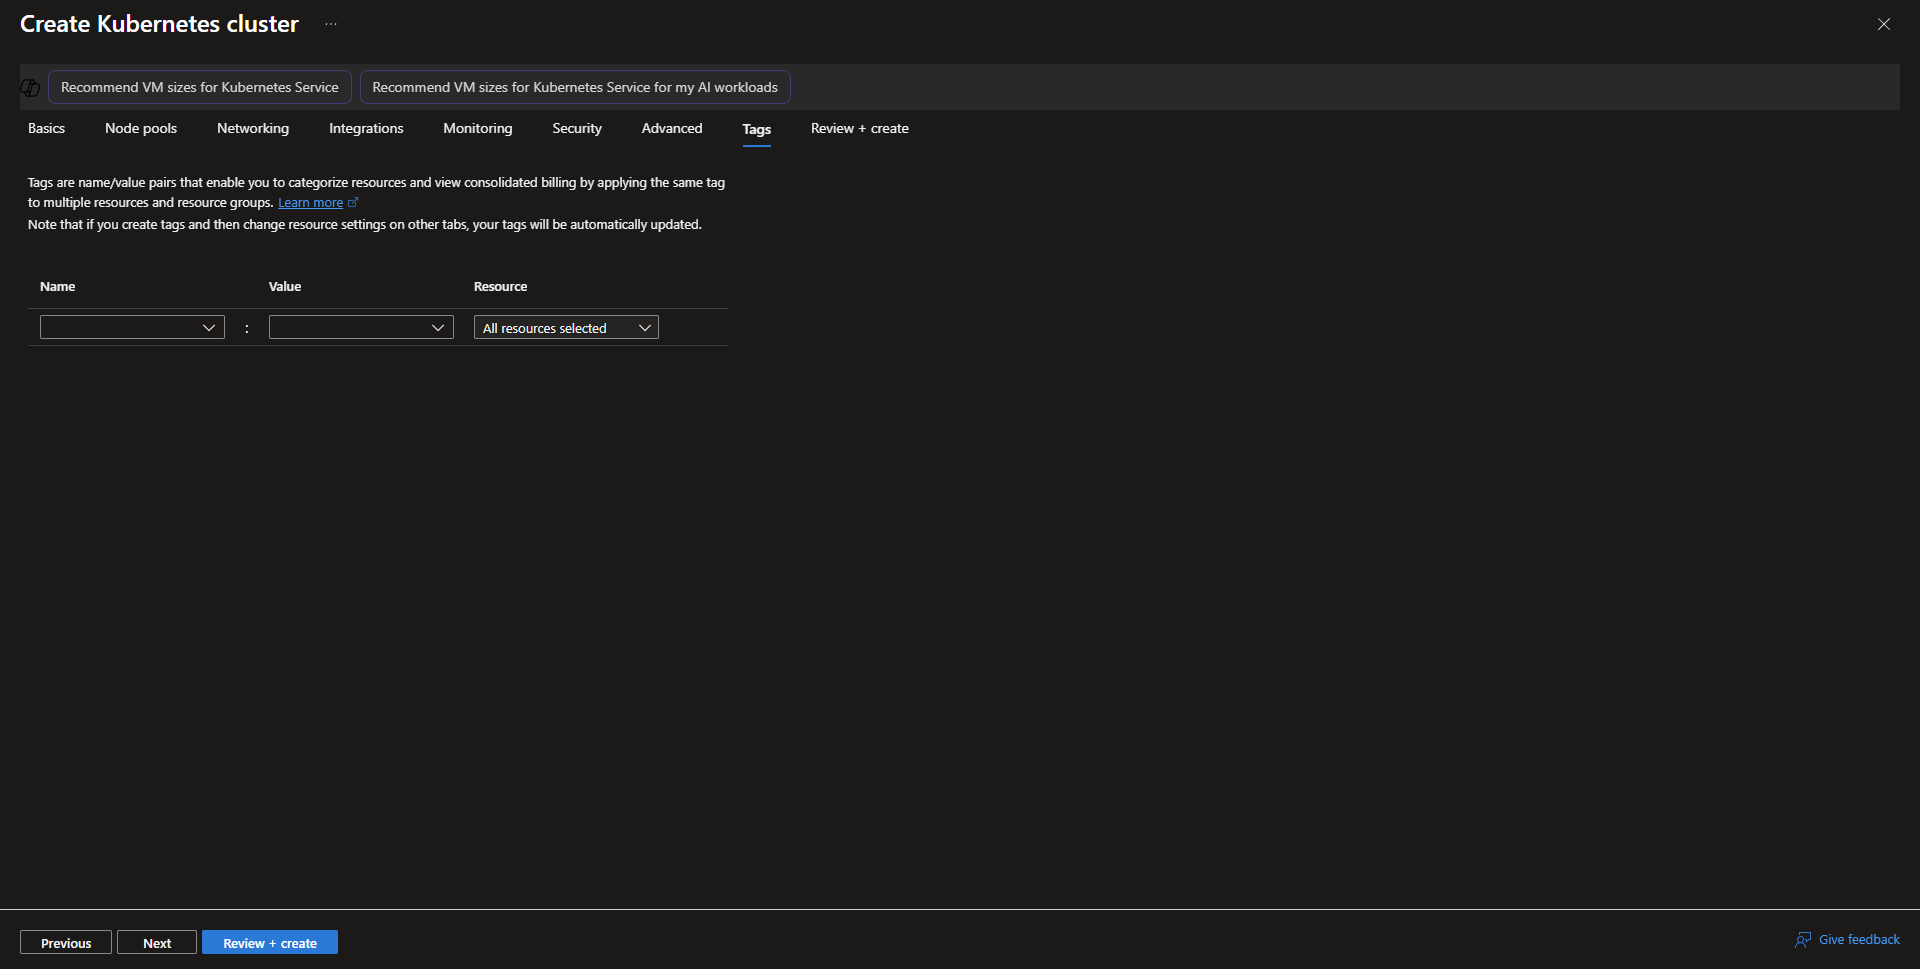
- Add tags for the resource, if desired and continue to review + create.
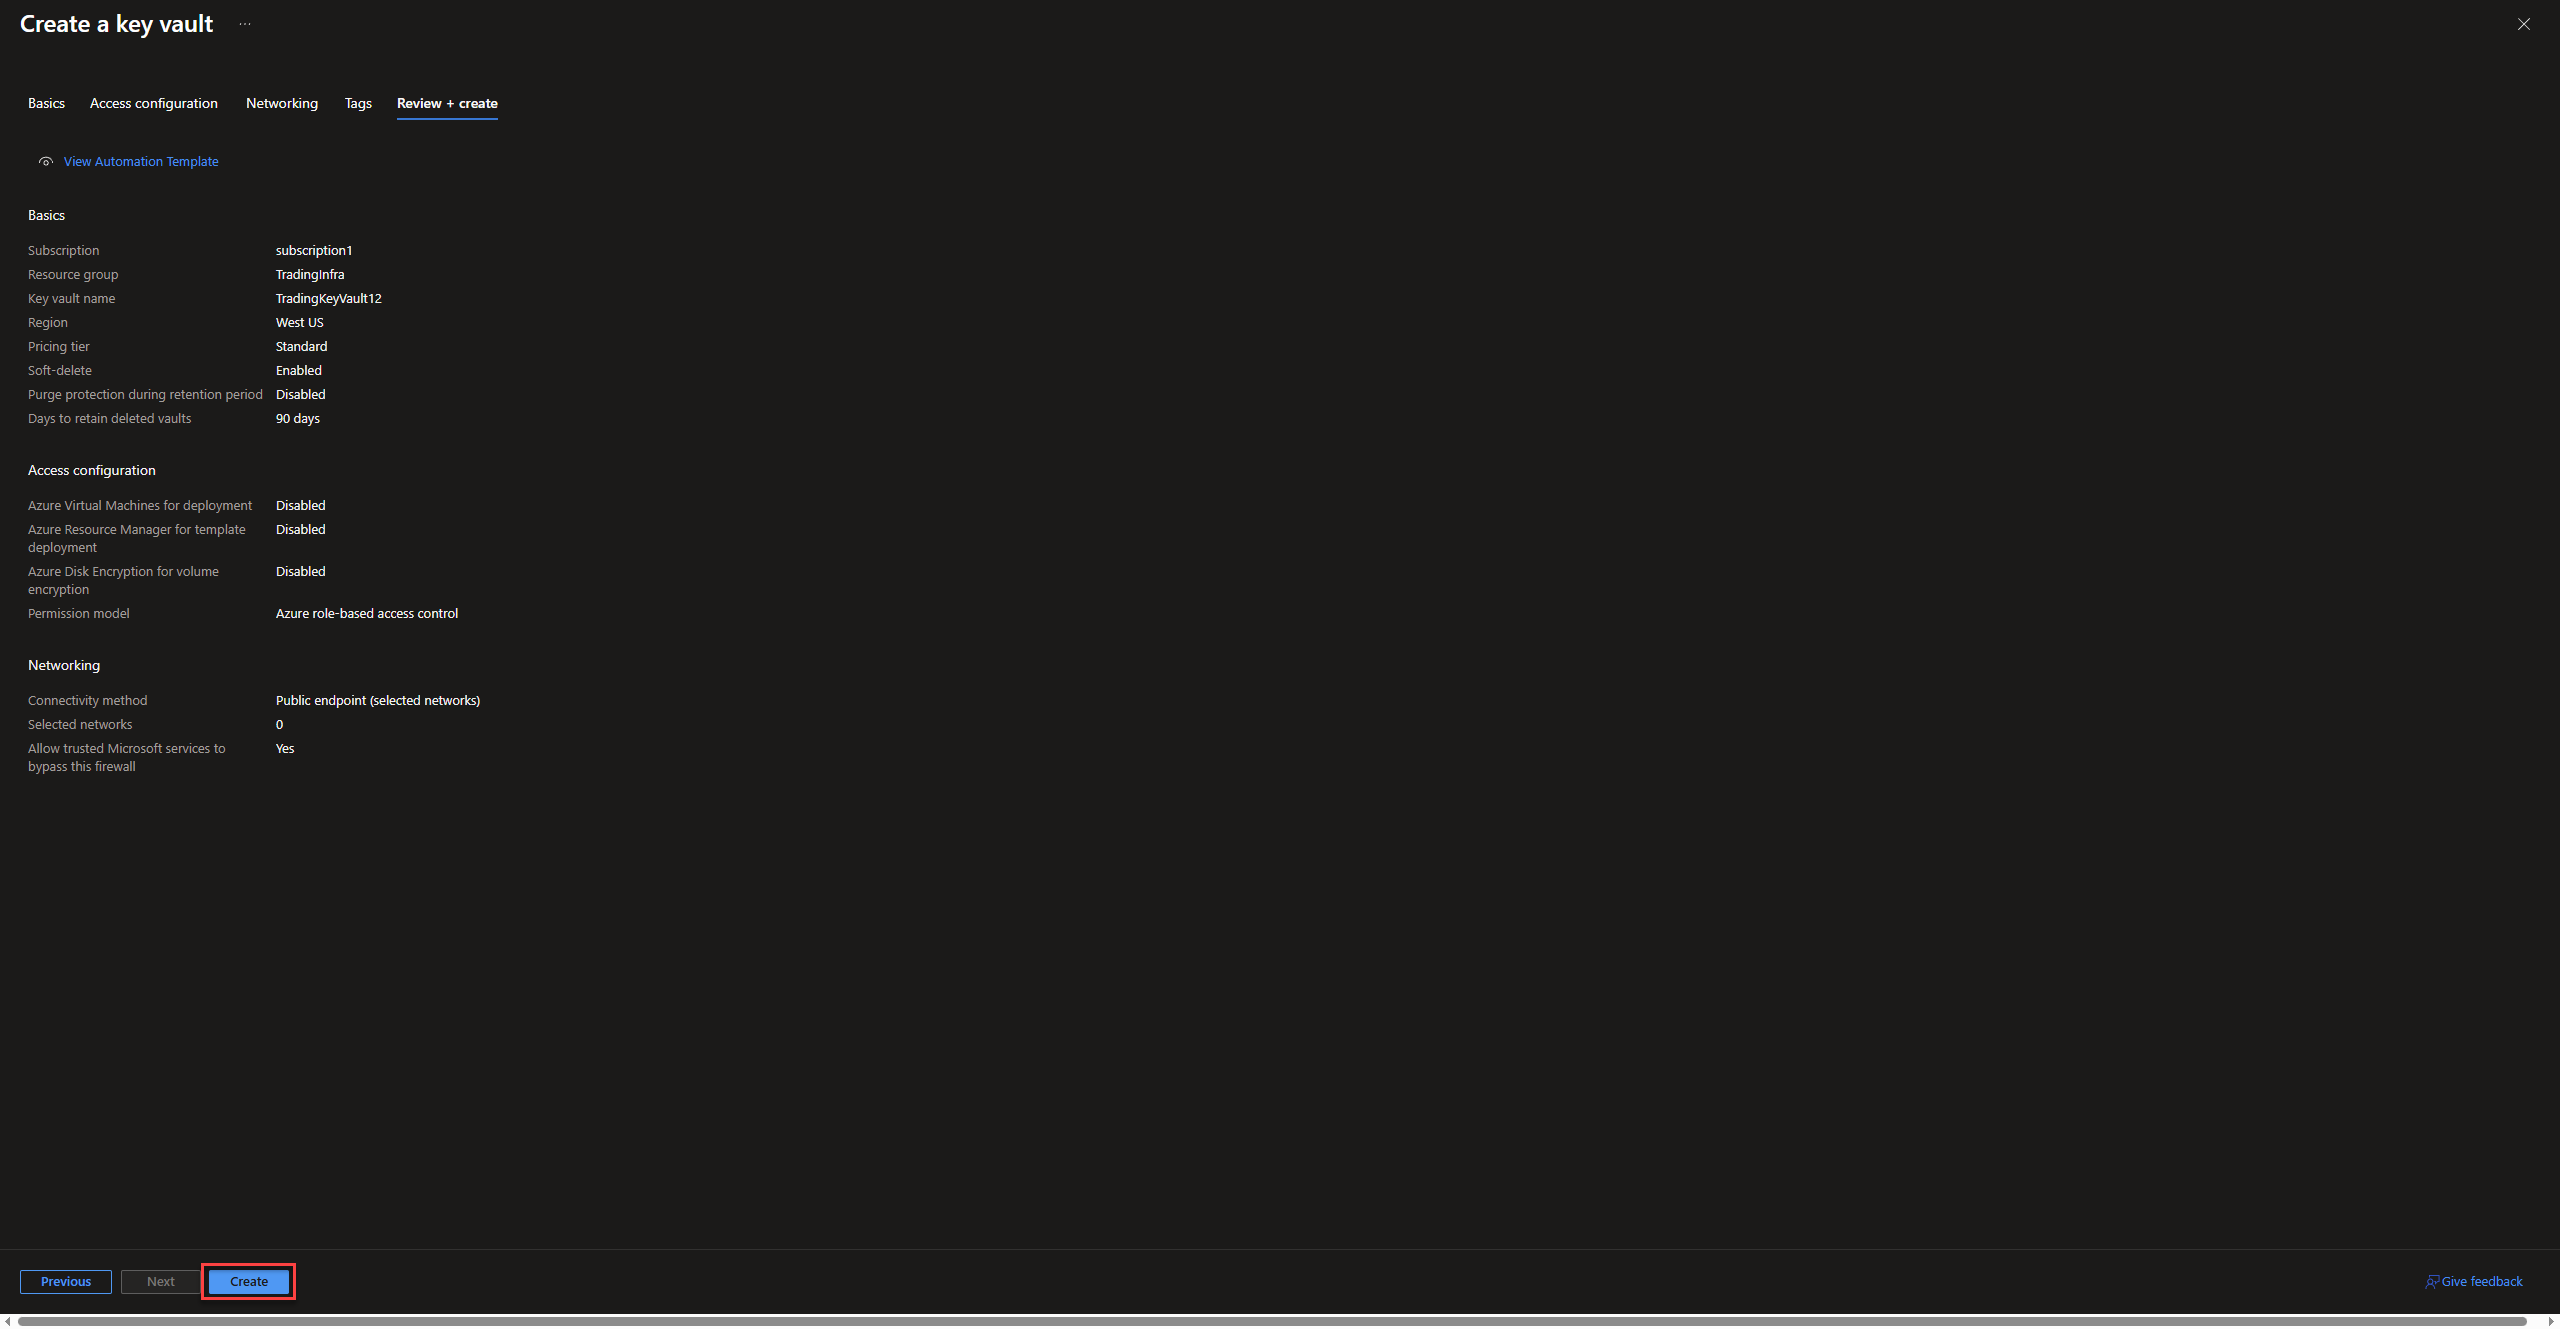
- review + Create
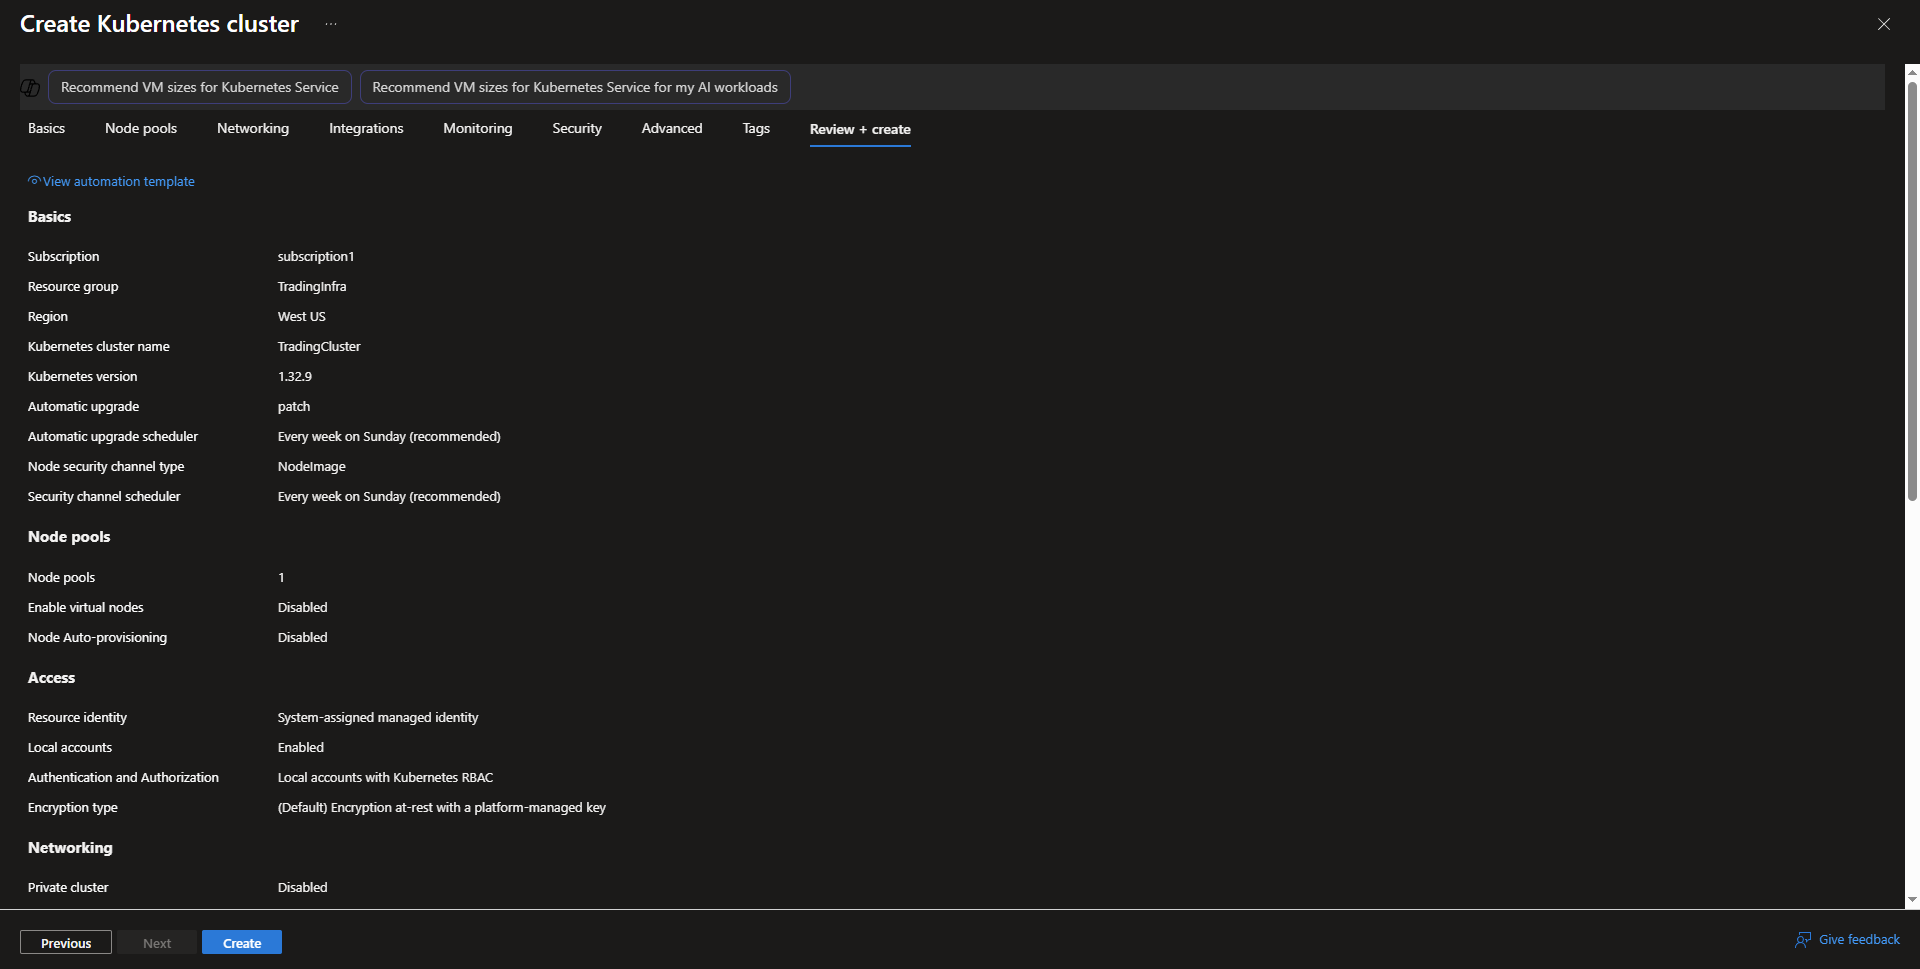
- Task completed for creating an AKS Cluster Resource.
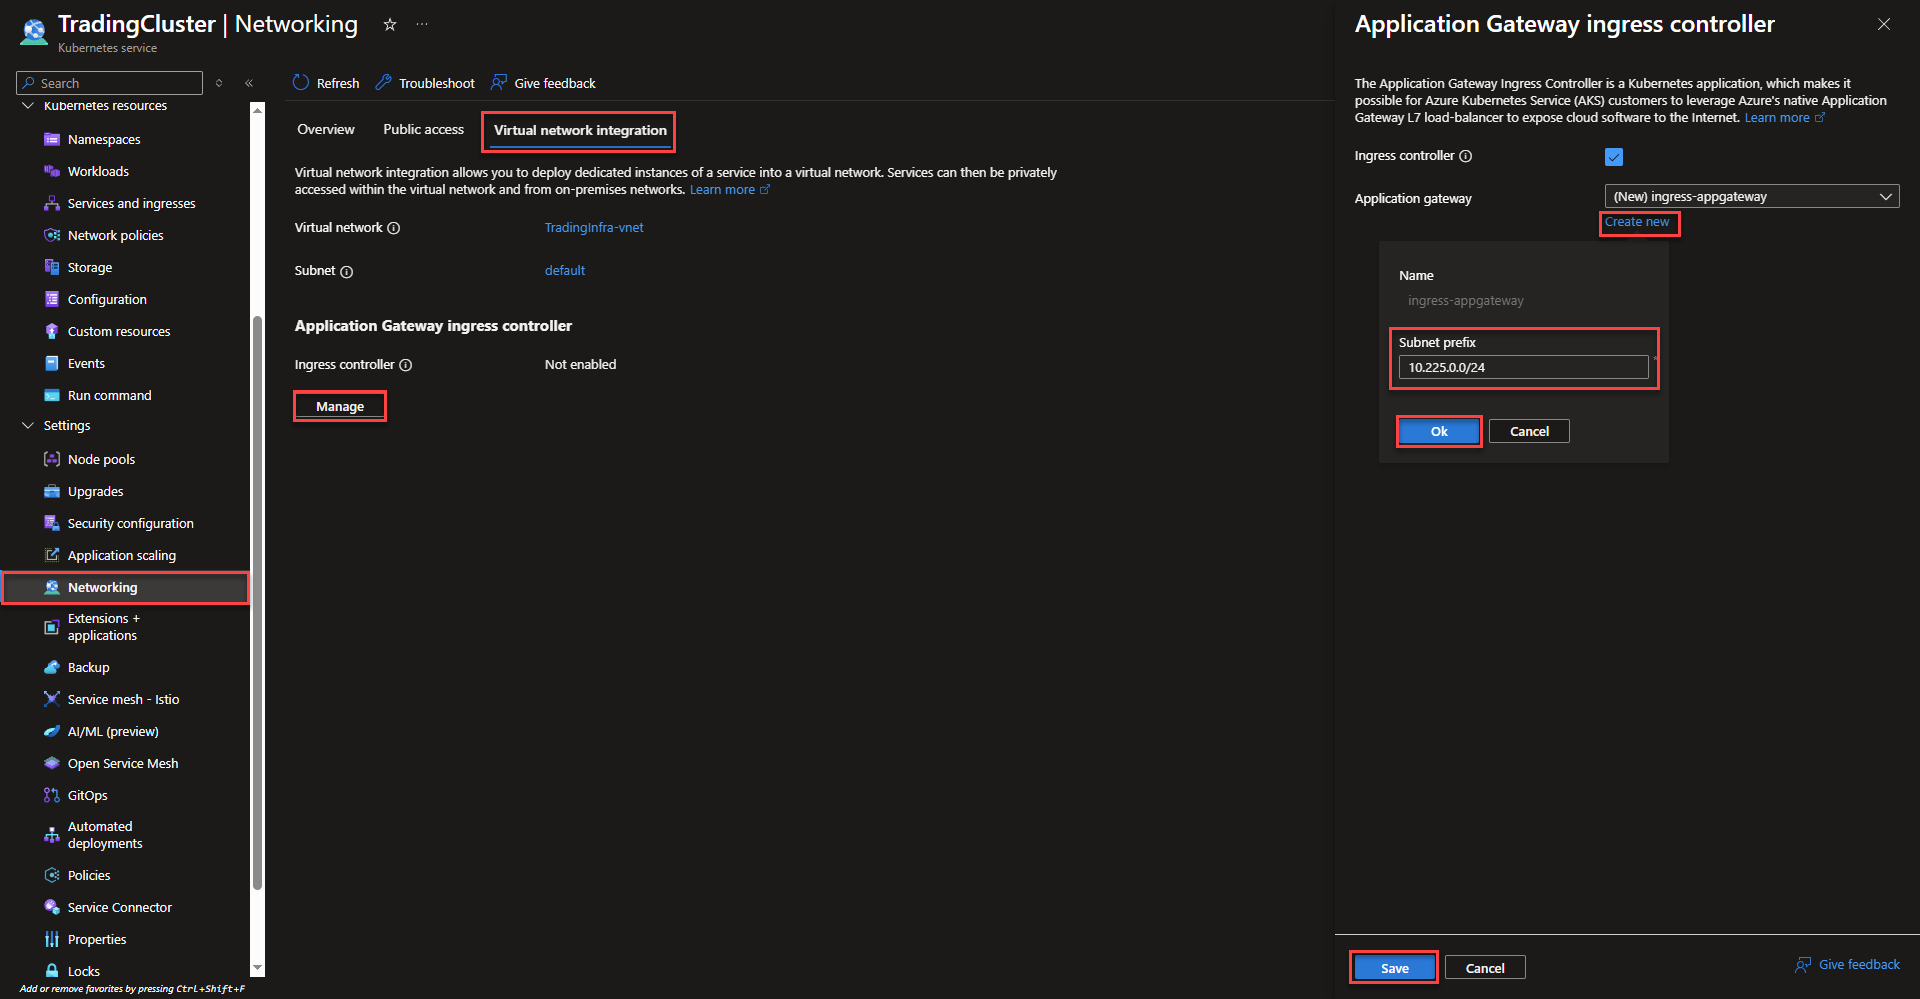
Enabling Application Gateway Ingress Controller (AGIC)
- Select On the networking page of the AKS Cluster, select the virtual network integration tab. Select manage under the ingress controller heading to create the new ingress controller. Check the box to enable the controller and select create new to specify the desired subnet. Select save and Azure will start the creation process in the background.